It is a pretty handy skill to completely get rid of the background of an image in Google Slides. However, it may seem a bit of a hassle if you are new to it. Whether you’re sprucing up a presentation or adding some flair to your slides, mastering this technique can make your work appear more professional.
However, in this article, we will help you learn how to remove background from picture in Google Slides step by step.
How to Make an Image Transparent in Google Slides
Making the images transparent in the Google Slides not only makes the presentations sophisticated but also adds depth to it. It allows the other elements to appear more clean, which creates a smooth and fluent design.

Here is how to fade background in Google Slides step by step:
Step 1: In order to get Google Slides remove background from image, start by opening the desired slide where you wish to incorporate the picture. Then, go to the “Insert” menu and select “Image” to upload the desired image.
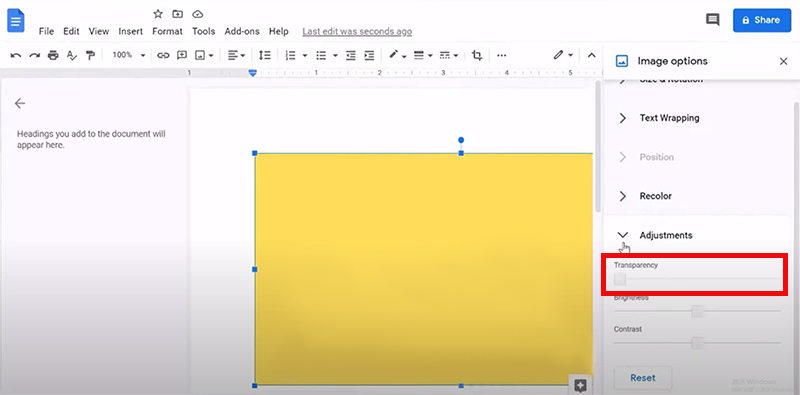
Step 2: After inserting the image, click on it to select it. Now, navigate to the toolbar and find the “Adjustments” option. The menu will open after you click it. Here, you can slide the transparency slider to the left to gradually fade the background.
Step 3: You can also fine-tune the transparency level by sliding the transparency bar until you achieve the desired effect. Make sure to preview how it looks against the slide background to ensure it blends well with your design.
Step 4: Once you’re satisfied with the transparency level, click “Apply” or “Done” to confirm the changes. Your image will now have a faded background, making your slides look more professional.
Step 5: Lastly, review your slide to ensure that the faded background enhances the overall design. If needed, you can always go back and adjust the transparency level until you achieve the perfect balance.
How to Make an Image Background Transparent in Google Slides
Knowing how to make the background transparent in Google Slides can provide your images with a consistent yet smooth look. However, it’s important to note that this feature requires Google Workspace Labs and may not be available to all users yet.

Here’s how you can remove image background Google Slides if you have access to this feature:
Step 1: Launch Google Slides and open the presentation where you want to edit the image.
Step 2: Click on the slide where you want to insert the image. Then, go to the “Insert” menu, select “Image”, and choose the image you want to edit.
Step 3: Once the image is inserted, click on it to select it. Then, go to the “Extensions” menu and select “Google Workspace Labs”. If you don’t see this option, it means the Labs feature isn’t available for your account.
Step 4: In Google Workspace Labs, search for “Remove Background” and enable the feature. This will add a new option to your toolbar.
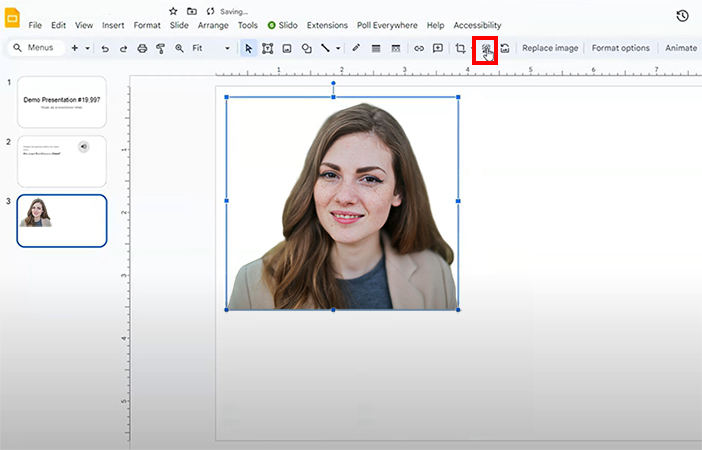
Step 5: With the image selected, click on the “Remove Background” option in the toolbar. Google Slides will attempt to remove the background automatically. You can fine-tune the selection if needed by clicking and dragging the handles around the areas you want to keep or remove.
It’s important to note that Google Workspace Labs features are experimental and may not be available to all users. If you don’t see the option to enable Labs or the “Remove Background” feature, you may need to check back later or explore alternative methods for removing image backgrounds.
How to Remove Background from Picture if Workspace Labs Feature Not Available
Most of the time, the Google Workspace Lab isn’t available. If you are also facing this issue, don’t worry! You can simply use the third-party watermark or background removers like FliFlik to remove background from image.
1: Remove Image Background using FliFlik KleanOut
Being one of the most trusted watermark and background removers, FliFlik KleanOut for Photo helps you process pictures in batches of even 20, which makes the process faster and easier. Moreover, its efficient tools can give your images a professional makeover.

With support for a wide range of file formats and efficient batch processing, KleanOut saves you time and effort while preserving the clarity of your photos.
Features
- Users can remove backgrounds from multiple images at once, saving you time and effort.
- Allows users to achieve precise background removal, ensuring the images look professional and polished.
- The user interface of FliFlik is pretty simple, and even a newbie can access and use all the tools easily.
- Supports various image formats, allowing you to work with a wide range of files.
To make transparent images with FliFlik Background Remover:
Download and install KleanOut for Photo on your computer. Launch FliFlik and select the “Remove Background from Image” option.
FREE DOWNLOADSecure Download
FREE DOWNLOADSecure Download
Click or drag to add images. Once you import the images, the background will automatically be removed. You can also use other tools, like “Eraser” and “Keep”, to manually adjust the areas that you want to remove or keep.
![make transparent background]()
After you are satisfied with the images, click the “Export” button to save it in your computer folders.
![export image with transparent background]()
2: Import the Image without Background to Google Slides
Once you are done with removing the background of your images using the FliFlik background remover, you can simply import it to Google Slides by following the below-listed steps:
Navigate to the slide where you want to insert the image.
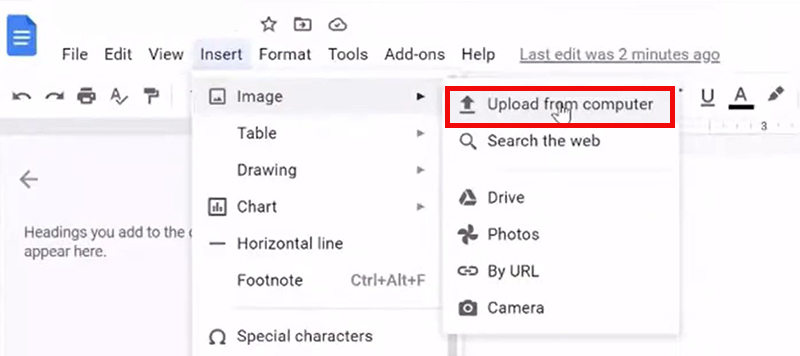
Click on “Insert” in the menu bar, then select “Image” and “Upload from computer”. Choose the edited image without the background from your computer.
![upload image to google docs]()
You can resize the image and position it where it fits best in the slides. Congratulations! You have successfully imported an image without its background into Google Slides.
FAQs about Removing Image Background in Google Slides
Q1: Is it possible to modify background in Google Slides?
It is a pretty simple process to remove background from image Google Slides. You only have to select the slide where you want to change the background and click “Change Background” on the top menu slide. Here, you can either remove the background or upload the one you like.
Q2: Can I remove backgrounds from multiple slides in Google Slides?
No, Google Slides doesn’t offer a built-in feature to remove backgrounds from multiple slides at once. You’ll need to remove backgrounds individually on each slide if needed. Alternatively, you can use external tools like FliFlik to edit the images before adding them to your slides.
Q3: How to get rid of white background on the image in Google Slides?
In order to remove a white background from an image in Google Slides, use the “Set Transparent Color” feature, simply click on the image, go to the “Format” menu, select “Image options”, and choose “Set Transparent Color”. Then, click on the white background to make it transparent.
Closing Remarks
In conclusion, mastering the art of how to remove background from picture in Google Slides enhances your presentation skills. However, there are times when it won’t work, and you would need a third-party background remover like FliFlik KleanOut for Photo. It doesn’t degrade your media, and maintains the original quality of your photos, ensuring they look just as stunning as when you first captured them.


