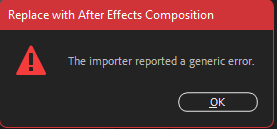
Errors are like unexpected roadblocks, disrupting workflow and productivity. One common issue users face is the importer reported a generic error, often occurring during data import or file processing tasks. This error typically arises due to incompatibilities, corrupt files, or incorrect configurations, leaving users frustrated and searching for solutions. Understanding the root cause is key to resolving it efficiently. Whether you’re dealing with software limitations or format mismatches, addressing this error promptly ensures smoother operations and prevents recurring disruptions in your projects.
Common Reasons that Lead to Premiere Pro Import Error
Software tools like Adobe Premiere Pro can sometimes throw unexpected errors, halting your creative flow. One such issue is the Premiere Pro importer reported a generic error, often caused by incompatible file formats, missing codecs, or corrupt media files.
1: Media File Cache
The media file cache in Premiere Pro stores temporary data to enhance performance and streamline file imports. If the cache becomes corrupted or overloaded, it can trigger errors like the reported a generic error. Clearing or rebuilding the media file cache often resolves such issues and improves overall workflow efficiency.
2: Unsupported Codec
An unsupported codec prevents Premiere Pro from processing specific video or audio files correctly. This occurs when the media uses a codec not recognized by the software. To fix this, you can convert the file to a compatible format or install the necessary codec to ensure smooth importing and editing.
3: Unsupported File Format
An unsupported file format occurs when Premiere Pro cannot recognize or process the media type you are trying to import. This often happens with less common formats or files missing proper extensions. Converting the file into a supported format, such as MP4 or MOV, usually resolves the issue and ensures compatibility.
Can Premiere Pro Import MKV?
Premiere Pro does not natively support the MKV file format, which can cause issues during the import process. To work with MKV files, users need to convert them into a compatible format like MP4 or MOV using third-party tools. This ensures seamless editing within Premiere Pro.
4: Activation Issues
Activation issues occurs when the software fails to verify a valid license, often due to internet connectivity problems, outdated subscription details, or Adobe account errors. These issues can disrupt functionality, including importing files. Resolving this involves ensuring an active subscription, reactivating the software, or contacting Adobe support.
5: File Name/File Path Error
File name or file path errors occur when Premiere Pro encounters special characters, excessively long paths, or unsupported symbols in file names or locations. These can prevent successful file imports. Renaming files with simple alphanumeric characters and shortening or reorganizing file paths often resolves the issue, enabling seamless importing.
How to Fix the Importer Reported a Generic Error
You know how frustrating it can be when an unexpected error disrupts your workflow. One such issue, the importer reported a generic error, often stems from file compatibility or system glitches, but fortunately, it can be resolved with a few simple troubleshooting steps.
Fix 1: Reinstall Premiere Pro
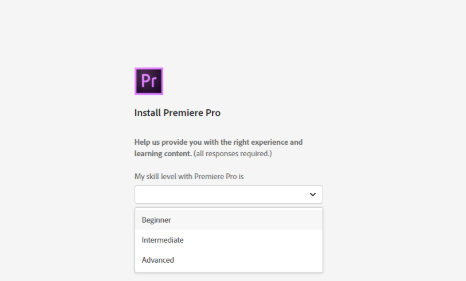
Reinstalling Premiere Pro can resolve persistent errors by replacing potentially corrupted or missing files within the software. Uninstall the current version, clear leftover files (like preferences or media cache), and then download and install the latest version from Adobe’s official site. This ensures a clean installation, eliminating conflicts or bugs that might cause issues during file importing.
Fix 2: Rename the File/Folder
Sometimes the simple solution lies in renaming individual files causing the issue when dealing with the Premiere Pro importer generic error have to rename. While renaming the folder might not work, changing each problematic file’s name (e.g., adding "_1") can bypass the error. Though time-consuming, this method forces Premiere Pro to re-index the media, resolving file path or recognition conflicts and allowing the clips to import successfully.
Fix 3: Move the File to Another Location
Moving the file to another location on your drive can resolve import errors in Premiere Pro by forcing the software to refresh its file path and indexing. Place the media in a different folder or drive and try importing it again. This method works by bypassing potential path conflicts or corrupted metadata associated with the original location.
Fix 4: Clear Media & Plugin Cache

Another solution is clearing the media and plugin cache entirely. Simply removing the cache from within Premiere might not suffice. Instead, restart Premiere Pro while holding the Shift key, which resets plugin settings and rebuilds the cache. This deeper reset can resolve persistent indexing or compatibility issues, effectively addressing import errors that standard cache clearing fails to fix.
Fix 5: Check Video File Format and Codec
When no other method works, checking the video file format and codec becomes essential. Ensure your media uses a format and codec supported by Premiere Pro, such as MP4 with H.264. If unsupported, convert the file using tools like HandBrake or VLC. This ensures compatibility, eliminating errors caused by format or codec mismatches during the import process.
How to Change Premiere Pro Unsupported Video File Format with UltConv
Although Premiere Pro is an advanced video editing tool, it can struggle with unsupported video file formats, causing import issues and workflow disruptions. This is where UltConv shines, providing an efficient and reliable way to convert files into Premiere Pro-compatible formats. With its user-friendly interface, fast processing, and robust format support, UltConv eliminates the hassle of dealing with incompatible files. It ensures smooth editing by converting media seamlessly, allowing you to focus on your creative projects without technical barriers.
-
Dwonload and install UltConv on your computer.
FREE DOWNLOAD
Secure Download
FREE DOWNLOAD
Secure Download -
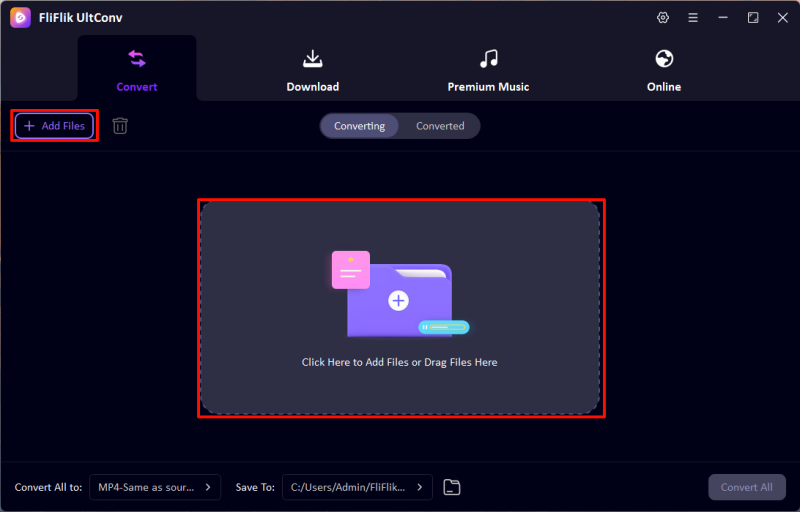
Open FliFlik UltConv and click on the Add File button. Browse through your computer’s files and select the MOV file you wish to convert.
![UltConv Upload Video]()
-
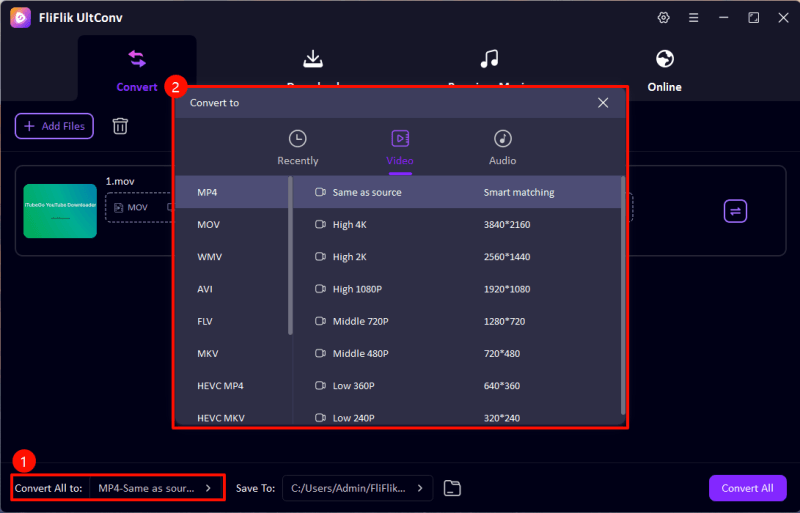
Open UltConv and click the “Add Files” button. Select the unsupported files you want to convert. From the format menu, choose a Premiere Pro-compatible format like MP4 (H.264). Adjust resolution or bitrate if needed.
![UltConv Converted Formats]()
-
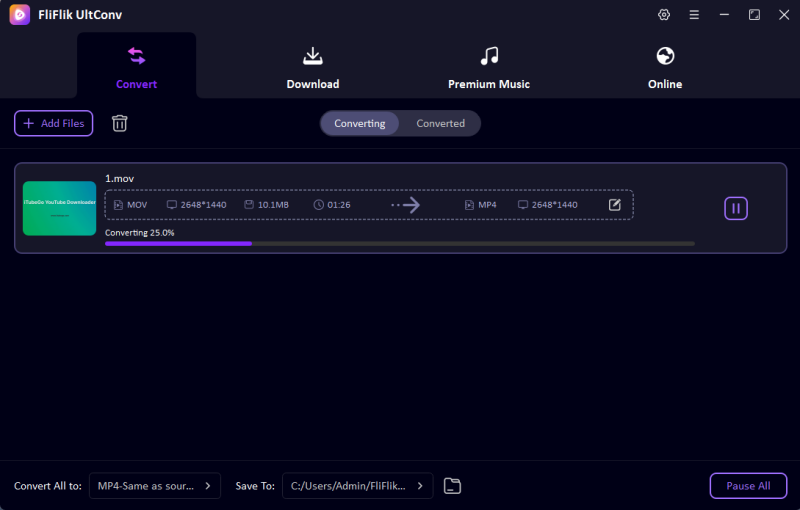
Click the “Convert All” button. Once the process finishes, access the converted files and import them directly into Premiere Pro.
![UltConv Converting]()
Final Words
To end it all up, dealing with errors like the importer reported a generic error can be frustrating, especially when file compatibility is the root cause. UltConv simplifies the process by converting unsupported formats into Premiere Pro-friendly ones. Its ease of use and versatility make it a must-have tool to ensure smooth, error-free video editing workflows.
FREE DOWNLOAD
Secure Download
FREE DOWNLOAD
Secure Download

