Blurring the edges of a photo can add a professional touch, create a focal point, and enhance the overall aesthetic of your images. Whether you’re a photographer, a designer, or a casual user looking to improve your pictures, knowing how to blur the edges of a photo is a valuable skill. Blurring photos can be crucial for several reasons. It can help draw attention to the main subject, create a sense of depth, and eliminate distractions from the background. Various tools and software can achieve this effect, each with its own set of features and complexities. Choosing the right platform can be challenging due to the variety of options available. This article will explore three different methods to achieve this effect, helping you choose the best platform for your needs and providing step-by-step instructions for each technique.
How to Blur the Edges of a Photo Free with Figma
Blurring the edges of a photo for free is possible using a variety of online tools and software. These tools are accessible to everyone and do not require any prior experience or technical skills, but free tools require skills to meet the needs; otherwise, the result would be unsatisfied. Figma is a free design tool with various features. The most important thing is Figma is free for personal users. You can use it to blur the edges of a photo for free.
Steps to Blur Edges of a Photo with Figma
Go to the official site of Figma. You may need to sign up or sign in, but don’t worry, it is totally free. Then you should open a project.
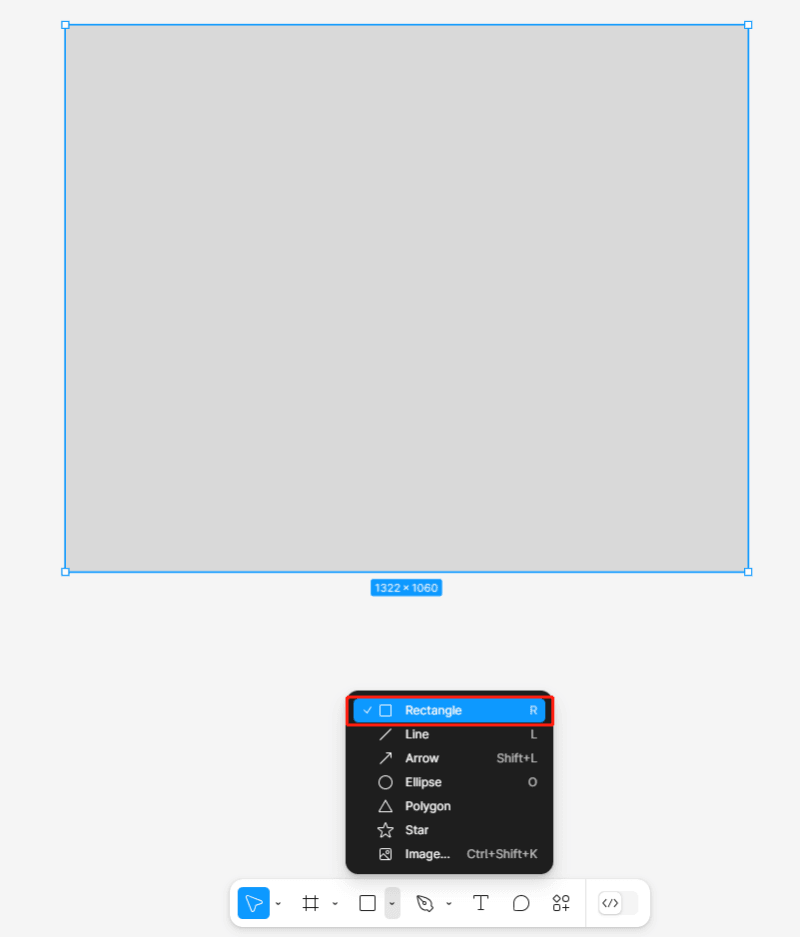
You can copy and paste or upload an image, and select the tools to create a rectangle. Make sure the size of rectangle is same as the image.
![Create a rectangle]()
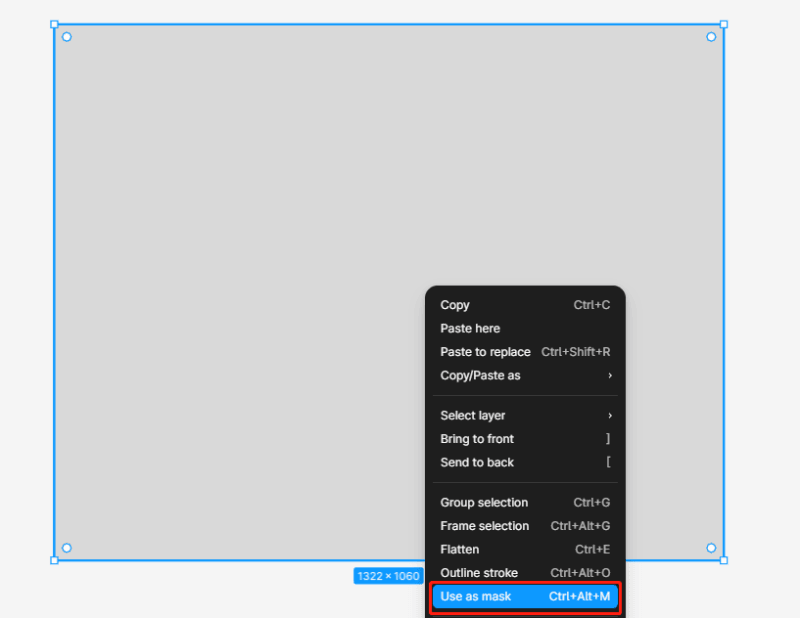
Right-click on the rectangle and select Use the mask.
![Use mask in Figma]()
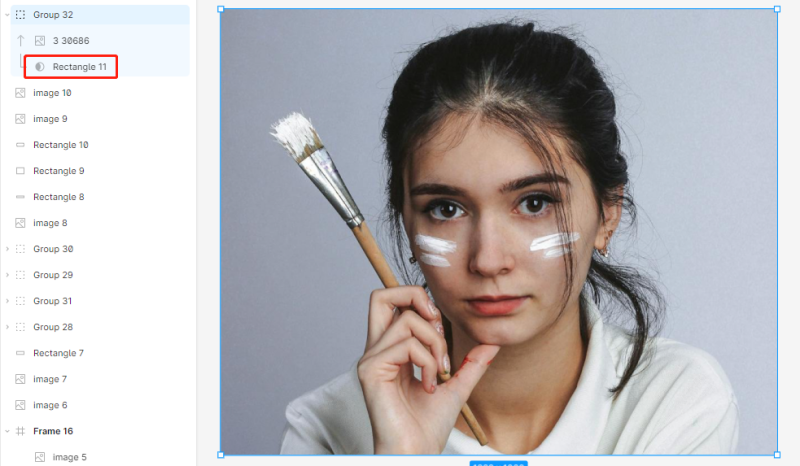
Group the image and rectangle, and you need to move the rectangle back of the image.
![Move the Mask behind image in Figma]()
Now, you can set the parameters of the mask, change the fill to Radial and set the colors.
![Blur the image]()
Everything is done, you can see the difference of the image.
![Compare the result]()
How to Blur the Edges of a Photo in Photoshop
Photoshop is a premier photo editing software renowned for its powerful features and versatility, making it an ideal tool for blurring the edges of a photo. With Photoshop, users can achieve precise and professional results through a variety of techniques, such as feathering selections and applying Gaussian Blur. This software offers unparalleled control over the intensity and area of the blur, allowing users to create subtle or dramatic effects as needed. Photoshop’s robust toolkit includes advanced selection tools, customizable blur filters, and detailed adjustment options, making it suitable for both beginners and experienced professionals. Whether enhancing the focal point of an image or creating a smooth transition between the subject and the background, Photoshop provides the functionality needed to blur photo edges effectively.
Steps to Blur Edges of a Photo in Photoshop
Launch Photoshop, click File > Open, and select your photo.
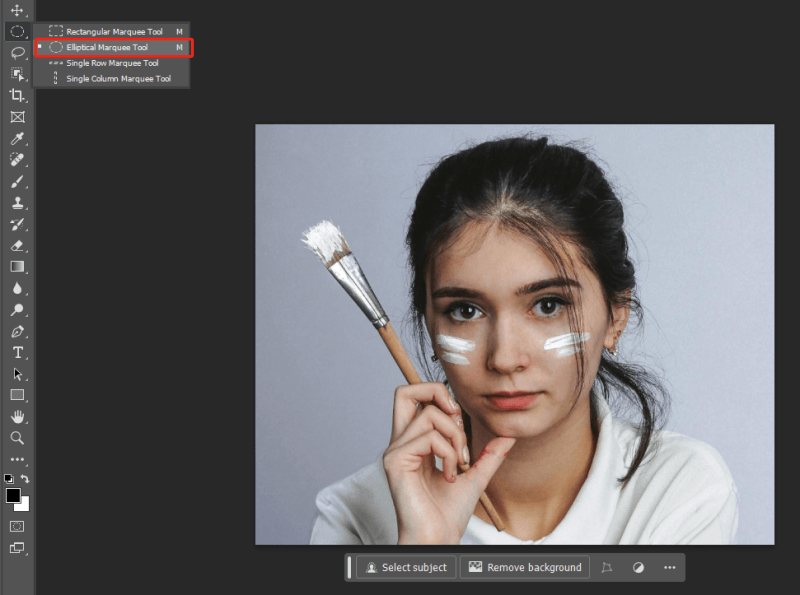
In the toolbar, click and hold the Marquee Tool icon, then choose the Elliptical Marquee Tool.
![Elliptical Marqueen Tool]()
Click and drag to create an elliptical selection over the focal area.
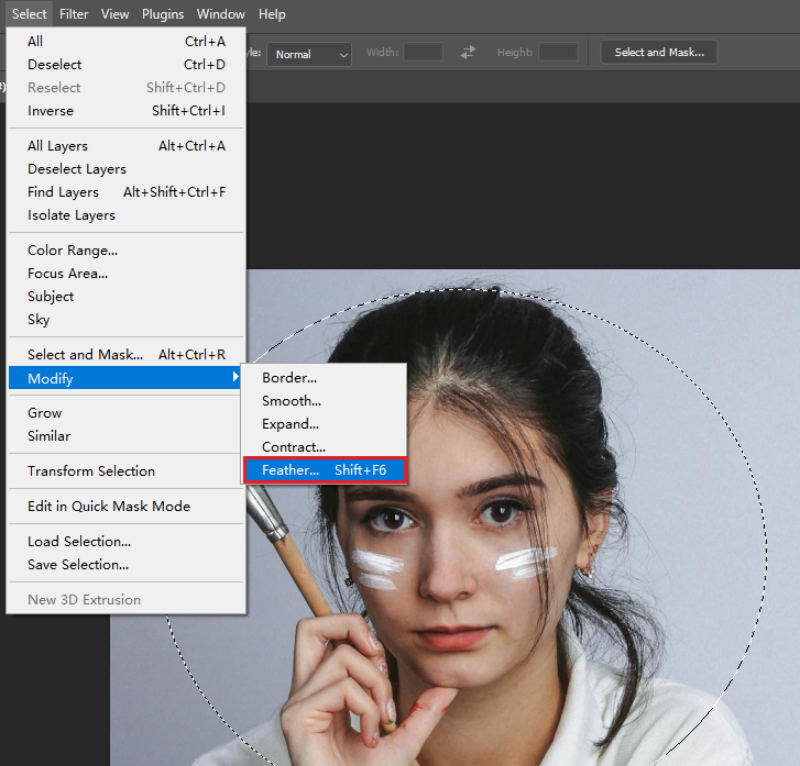
Go to Select > Modify > Feather. Set the feather radius for a smooth transition.
![Modify the Feather]()
Press Shift + Ctrl + I (Windows) or Shift + Command + I (Mac) to invert.
Go to Filter > Blur > Gaussian Blur. Adjust the blur level and click OK.
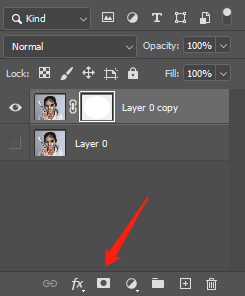
![Apply the mask in PS]()
Press Ctrl + D(Windows) or Command + D(Mac). Then, click File > Save As, choose a format and location, then save your photo.
By following these steps, you can effectively blur the edges of a photo, creating a professional and polished look.
How to Blur the Edges of a Photo in Canva
Canva is a widely used online design tool known for its ease of use and versatility, making it an excellent choice for blurring the edges of a photo. Canva’s intuitive interface allows users of all skill levels to quickly and effortlessly edit their images. The platform provides a straightforward approach to blurring, with easy-to-navigate options and sliders that let users control the intensity and area of the blur effect.
Canva’s Adjust feature includes a blur slider, while the “Effects” tab offers a vignette option to create a soft edge blur. These tools make it simple to highlight the main subject and create a professional, polished look. Canva’s drag-and-drop functionality, combined with its wide range of templates and design elements, ensures that users can enhance their photos with minimal effort.
Launch Canva and log in to your account. Click on the Create a design button, then select a custom size or template. Upload your photo by dragging it into the workspace or using the Upload button.
![Create the Design]()
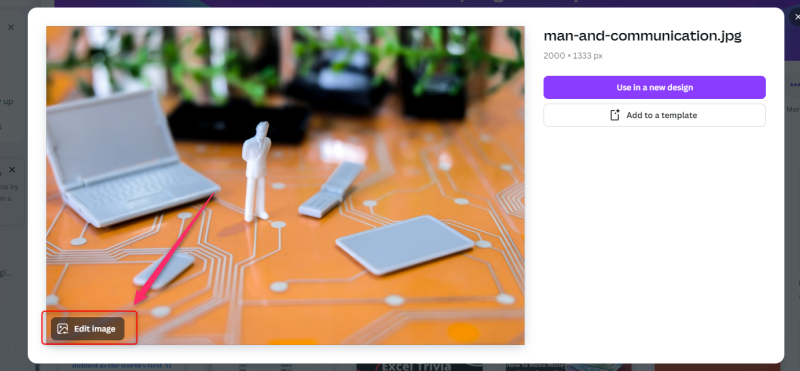
Click on your uploaded photo to select it. A toolbar will appear above the workspace. Click on the Edit Image button to open the editing options.
![Edit Image on Canva]()
In the editing panel, click on the Adjust tab. Locate the Blur slider among the adjustment tools.
![Canva Adjust]()
Move the Blur slider to the right to increase the blur effect on your photo. Adjust it until you achieve the desired level of blur.
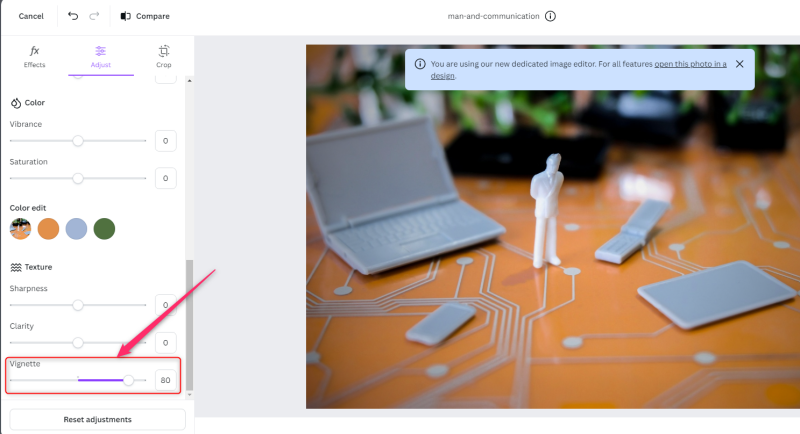
To specifically blur the edges, go to the Effects tab in the editing panel. Scroll through the effects and select the Vignette option.
![Vignette Effect on Canva]()
Use the sliders to control the intensity and size of the vignette, which will create a blurred edge effect around your photo.
Once satisfied with the effect, click on the Download button at the top right corner. Choose your preferred file format and download your edited photo.
With Canva, you can easily blur the edges of a photo and customize the effect to suit your needs.
Extra Tips: How to Unblur a Photos with One Click
Introducing FliFlik KlearMax for Photo, a powerful tool designed to unblur images with just one click. This tool is ideal for those times when your photos come out blurry and you need a quick fix. FliFlik KlearMax for Photo uses advanced algorithms to enhance image clarity and restore details, making your photos look sharp and professional.
FliFlik KlearMax for Photo is user-friendly and does not require any technical expertise. Whether you’re a professional photographer or a casual user, this tool can help you salvage blurry photos effortlessly. Its one-click unblur feature is perfect for quick fixes and ensures your images always look their best.
Steps to Unblur a Photo Using FliFlik KlearMax
Visit the official FliFlik website and download the latest version of FliFlik Klearmax for Photo. Next, follow the installation instructions to install the software on your computer.
FREE DOWNLOADSecure Download
Coming SoonSecure Download
Open FliFlik Klearmax for Photo from your desktop or application folder. Click on the Select Images button. Select the blurred image you want to unblur from your files and click Open to load the image into the application.
![Select Photos]()
There are 3 major AI models of FliFlik Klearmax for Photo, which includes General, Denoise, and Face. Each model excels specifically at unblurring various objects. Choose the appropriate model the click on the Enhance Now button.
![Different AI Models on KlearMax]()
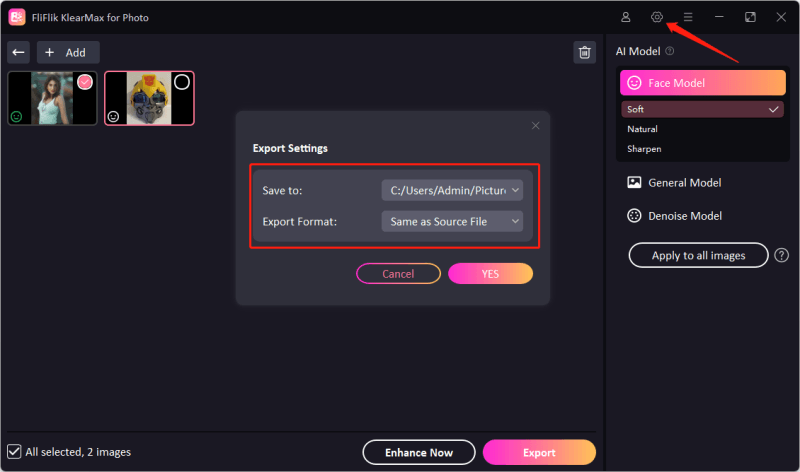
Click on settings to choose your target URL path and image extension. Then finally click on export to save the unblurred image on your PC.
![Set Export Path]()
Click on settings to choose your target URL path and image extension. Then finally click on export to save the unblurred image on your PC.
Conclusion
Blurring the edges of a photo is a simple yet effective way to enhance the focus and aesthetic appeal of your images. Whether you prefer using Figma, Photoshop, or Canva, each method offers unique benefits and can help you blur edges of photos and create stunning visuals with ease. Additionally, with tools like FliFlik KlearMax for Photo, you can effortlessly unblur photos, ensuring your images always look their best. By following the step-by-step guides provided in this article, you’ll be able to unblur the images to make it crystal clear.
