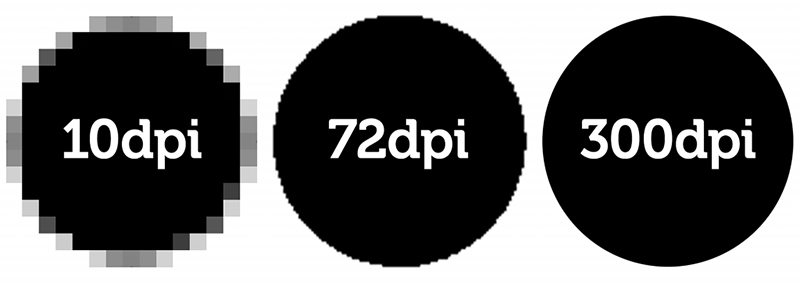
Understanding DPI (dots per inch) is important for getting high-quality prints. It is the number of dots that can be printed in a linear inch, and it affects how sharp and detailed your printed images will be. The higher the DPI, the more detailed and clearer the printout. Whether you’re working on photos, posters, or any other visual material, the DPI for Printing directly influences how sharp and vibrant the final output will be. This article will explain what DPI is, why it’s important, and how it impacts the overall quality of your prints.
What Is DPI? How Does It Affect Printing?
Dots per inch (DPI) measures how sharp a printed image will be. It shows how many ink dots are put in one inch. The more DPI, the sharper and more detailed the image looks. Low DPI can make an image seem pixelated or blurry. When deciding on the best DPI for Printing, it’s important to consider the material you’re printing. For most standard prints, like photos or documents, a DPI of 300 is usually recommended. The DPI values affect various aspects of Printing. Following are some of the ways in which it affects the Printing.

Image Clarity And Sharpness
The clarity and sharpness of a printed image depend on DPI. The higher the DPI, the more ink dots per inch, which means finer details and smoother color transitions. This is important for high-quality prints like photos and professional artwork.
Print Size And Viewing Distance
The right DPI depends on how big the print is and how far away it will be seen. Bigger prints like banners can have lower DPI (about 150) because they’re usually seen from afar. However, smaller prints like brochures need higher DPI.
File Size And Processing Time
When you use a higher DPI, the file sizes are bigger because more data is needed to store the increased number of dots per inch. For example, a 600 DPI image will have much more data than a 300 DPI image, which can be challenging.
What Is The Best DPI For Printing?
DPI represents the quality of a printed image. Understanding what DPI should you use for Printing is important if you want to get prints with good quality and vibrant colors. Below listed are some of the common DPI settings for different printing requirements.
300 DPI: To achieve sharp and clear prints with fine details visible, a DPI setting of 300 DPI is usually recommended for professional printing projects. This setting is considered the gold standard for achieving the best print quality.
150 DPI: This DPI setting is often used for larger prints or designs when the viewer stands farther away. For example, banners or large posters viewed from a distance can still look good at 150 DPI.
72 DPI: This DPI is best for digital images on screens rather than for prints. It’s not good for high-quality Printing because the image might look pixelated and unclear. Therefore, specify your needs before setting up a DPI for Printing.
How To Easily Convert Low To High Resolution Photos
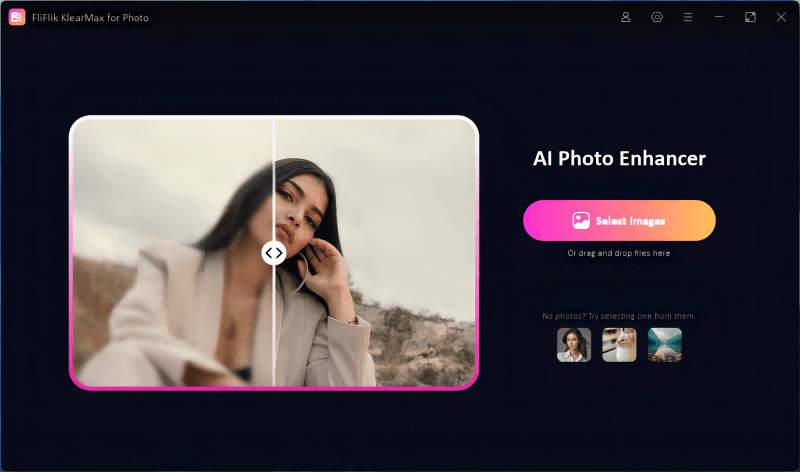
Have you ever taken a photo and realized it’s not clear enough for printing or large displays? Well, now you can easily improve the quality and detail of low-resolution images with FliFlik KlearMax for Photo. This powerful tool specializes in upscaling images, making it perfect for converting low-resolution photos into high-resolution ones. Moreover, it enhances the quality of your images, making them suitable for professional prints.

Features
- Enhances and adjusts color accuracy to ensure the final image remains vibrant and colorful.
- Reduces unwanted noise and grain in images with its AI Denoise Model, resulting in cleaner visuals.
- Adjust various settings to tailor the enhancement process to your needs and preferences.
- It is easy to navigate, which makes it accessible for both beginners and professionals alike.
To enhance low resolution photos in KlearMax for Photo:
-
Download and install the program. Launch the KlearMax for Photo on your computer. You’ll be greeted with a simple, intuitive interface.
FREE DOWNLOADSecure Download
Coming SoonSecure Download
-
Click the “Select Images” button and select the low-resolution photo you want to enhance. Now, navigate to the lower end of the editor interface, and you will find a Resolution button. Click on it and select a suitable resolution, like 1280*720, from the dropdown. Moreover, the instant face model can enhance the image in no time.
![KlearMax AI Models]()
-
Click “Enhance Now” to start the enhancement process. Once completed, click “Export” to save it to your PC.
![Export the Images]()
FAQs about DPI for Printing
Q1: Does higher DPI mean better print?
A higher DPI usually means better print quality. This is because more ink dots per inch result in finer detail and sharper images. However, the actual improvement in quality also depends on the original image resolution and the printer’s capability. For most prints, a DPI of 300 is considered high quality.
Q2: What happens if DPI is too high?
When the DPI is too high, it can create large files that might slow down Printing and require more storage space. Also, once DPI reaches a certain point, increasing it may not noticeably improve print quality. Therefore, it is recommended that moderate DPI be used for printing.
Conclusion
Understanding DPI for Printing is important for getting the best quality prints. DPI affects how sharp and detailed your printed images will be. For the highest quality prints, it’s recommended to use a DPI of 300 to make sure you get clear and crisp results. However, if you have low-resolution images and want to improve their quality for Printing, you can use the FliFlik KlearMax for Photo. This tool can effectively enhance images, making them look sharp and professional at any DPI.
Coming Soon


