Grainy photos can be frustrating, especially when you want your images to look crisp and clear. Whether it’s due to low light conditions, high ISO settings, or simply a camera malfunction, graininess can affect the overall quality of your photos. Fortunately, there are efficient ways to fix grainy photos and bring out the best in your images. In this guide, we’ll explore simple yet effective techniques that can help you reduce noise and improve the clarity of your photos, making them look sharp and professional in no time.
Why Does My Photo Look Grainy?
Grainy photos, often referred to as having “noise”, can occur for several reasons, diminishing the quality of your images. Here are some common causes:
- Low Light Conditions: When shooting in dimly lit environments, your camera may increase the ISO to compensate, resulting in more grain in your photos.
- High ISO Settings: ISO controls the camera’s sensitivity to light. Higher ISO settings are often necessary in low light but can introduce significant noise.
- Small Sensor Size: Cameras with smaller sensors tend to produce grainier images, especially in challenging lighting conditions.
- Underexposure: Photos that are too dark and then brightened in post-processing can exhibit more grain.
- Poor Camera Settings: Incorrect settings, such as slow shutter speeds or poor aperture choices, can also contribute to graininess.
How to Fix Grainy Photos in Photoshop
Fixing grainy photos in Photoshop is a straightforward process that can significantly enhance the quality of your images. Photoshop offers powerful tools to reduce noise and smooth out the grain while preserving essential details in your photos. By following a few simple steps, you can quickly transform a grainy image into a clearer, more professional-looking photograph.

To fix grainy photos in Photoshop:
- Launch Photoshop and open the grainy photo you want to fix.
- Create a duplicate layer of your image by right-clicking on the background layer and selecting “Duplicate Layer”. This allows you to work non-destructively.
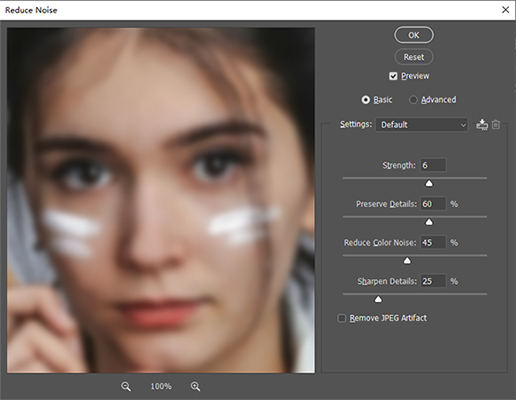
- Go to the “Filter” menu, select “Noise”, and then choose “Reduce Noise”. Adjust the sliders for Strength, Preserve Details, Reduce Color Noise, and Sharpen Details until you achieve the desired effect.
- For areas with excessive grain, you can use the Blur Tool to further smooth out the noise without affecting the entire image.
- After reducing noise, use the “Smart Sharpen” feature under the “Filter” menu to restore some detail, being careful not to reintroduce grain.
How to Make Photo Less Grainy without Photoshop
If you’re looking to enhance grainy photos without using Photoshop, KlearMax for Photo offers a powerful solution. This user-friendly software is designed to quickly and efficiently reduce noise and improve image quality, making it an excellent alternative for photographers who want to achieve professional results. With KlearMax for Photo, you can effortlessly refine your images using advanced AI models tailored for various types of photos.

Features
- Process multiple photos at once, saving time and effort.
- Try out all features without any cost before making a purchase.
- Compatible with both operating systems for versatility.
- Quickly restore clarity to blurred photos with advanced algorithms.
To fix grainy photos using KlearMax for Photo:
-
Download and install KlearMax for Photo. Launch the software and import the photos you wish to enhance.
FREE DOWNLOADSecure Download
Coming SoonSecure Download
-
Choose the appropriate AI model and mode (such as Soft, Natural, or Sharpen) based on the type of photo you want to enhance.
![KlearMax AI Models]()
-
After processing, click the “Export” button to save your high-quality, grain-free images to your desired location.
![Export the Images]()
Useful Tips to Avoid Grainy Photos
Avoiding grainy photos starts with understanding the key factors that contribute to noise in your images. Here are some useful tips to help you capture clearer, sharper photos:
Use Lower ISO Settings: Whenever possible, use the lowest ISO setting to reduce noise. Higher ISO settings are more sensitive to light but can introduce graininess.
Ensure Proper Lighting: Good lighting reduces the need for high ISO settings, leading to clearer photos. Try to shoot in well-lit environments or use additional light sources.
Opt for a Larger Aperture: A larger aperture (lower f-stop) allows more light into the camera, reducing the need for high ISO.
Stabilize Your Camera: Use a tripod or stabilize your camera to avoid motion blur, which can add to the graininess of your photos.
Final Words
To fix grainy photos, focus on using proper camera settings, adequate lighting, and stabilization techniques. For those looking for a quick and effective solution, KlearMax for Photo offers a powerful, user-friendly way to reduce noise and enhance image quality. With its advanced features and ease of use, it’s an excellent tool for achieving professional results.
Coming Soon


