Uploading lower resolution and lower quality images on social media platforms doesn’t make sense as it won’t help you get the achievements you’ve been looking for. Thus, finding several ways to learn how to make a picture bigger makes sense, but only the handful of the tools available in the market allows you to increase the image size while maintaining the quality of images.
Tune into this guide to explore the magnificent ways to learn how to make a picture bigger without losing quality.
Part 1. How to Make a Picture Bigger Without Losing Quality
While increasing the resolution of an image, everyone wants to go for software that doesn’t affect the quality of the images, and that’s what FliFlik KlearMax for Photo is all about. It is mind blowing AI Photo Enhancer that has introduced the 8 latest AI models to enhance the quality of the images more appropriately and significantly.
FliFlik KlearMax for Photo helps you to customize the resolution of the images separately, and you can choose the preferred custom dimensions of the images quickly.
Steps to make a picture bigger with FliFlik KlearMax for Photo
Click on the Download button to get the software downloaded, and start the program and then import the photo you wish to enlarge.
FREE DOWNLOADSecure Download
Coming SoonSecure Download
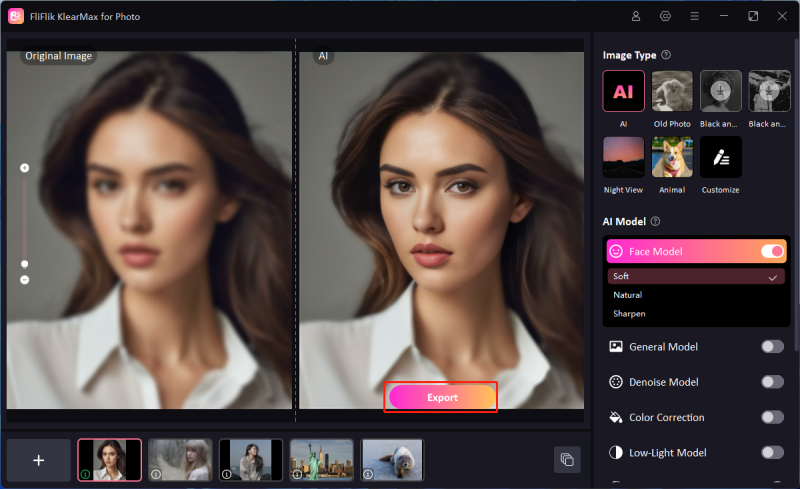
Upon Uploading the images, you’ll see the AI models on the screen, but since you’re looking to enlarge the images, you’ll need to choose the Resolution option from there, and select the General Model. You can enlarge the picture to 2k, 4k, 8k.
![Change resolution in Klearmax]()
After clicking on the Enhance Now button, you can review the image.
![Different AI Models on KlearMax]()
If you are satisfied with the outcome of the images, you’ll need to select the Export button to get the image downloaded.
![Export the Image]()
Part 2. How to Make a Picture Bigger in Photoshop
Adobe Photoshop is a commendable photo editor to adjust the various parameters of an image, and customizing the quality of the images is also a remarkable feature of Adobe Photoshop. Since it is a professional photo editor, the interface it prompts could be difficult for you, but it maintains the original quality while resizing the images.
Steps to make a picture bigger in Photoshop
Upload your image that need to be enlarged.
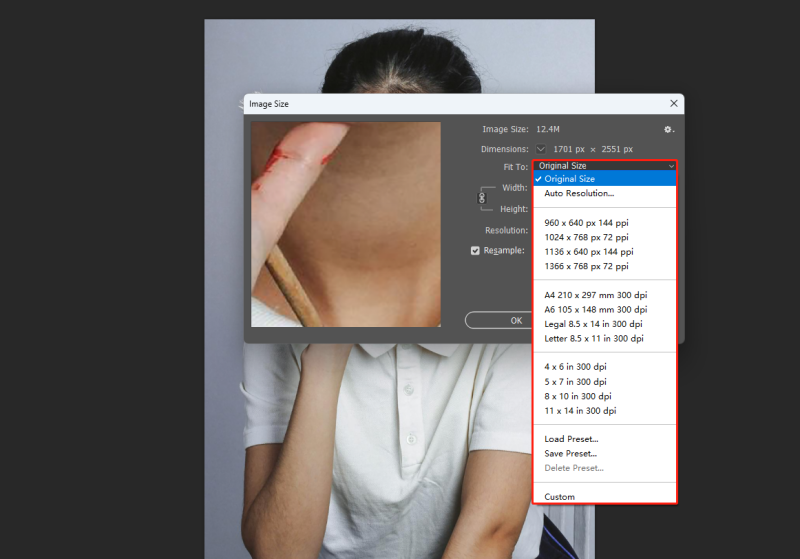
Go to Image > Image Size (or Use the Hot Key Ctrl+Alt+I), you can select the presets of image size like 4×6, 5×7, or A4, A6, etc.
![Make the image bigger in Photoshop]()
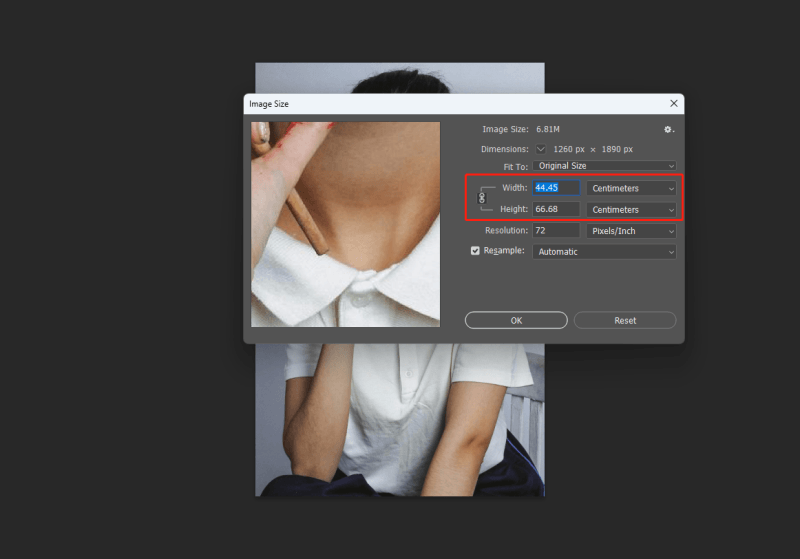
You can also enter the size by your self. By clicking OK, you can see the change of the image.
![Enlarge the image in Photoshop]()
Part 3. How to Enlarge Image with Online Photo Editor
If you’re looking to know how to make a picture bigger, you can also aim at online options like Fotor. Despite being an online tool, it tends to maintain the original resolution of the images while editing them. You won’t see any annoying watermark on the edited images and while enlarging the images, Fotor doesn’t take any extra time either.
Steps to make a picture bigger Online
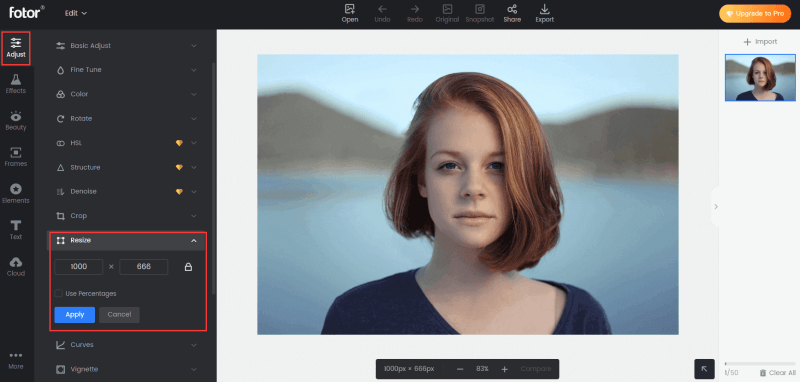
After going to the official webpage of Fotor, you’ll need to import the image into the timeline of Fotor. Next, you’ll need to tap on the Resize icon in the Size Option and enter the preferred values in the box.
Once you’re done enlarging the images, you can download the images in the PNG or JPF format.
![Resize the image in Fotor]()
Part 4. How to Make a Picture Bigger For Free
1. On Winodws Paint
Despite trying the options listed above, Windows Paint is another great tool to make a picture bigger. It is a built-in photo editor of Windows that empowers you to customize the image parameters effortlessly and doesn’t mess up the quality of images to a great extent.
Once you open the image with Windows paint, you can select the Resize and Skew button.
Press the Pixel to start edit.
Click on the OK button and select the Save as icon. You can also select the JPEG as the destination image format before downloading the images to the timeline of the computer.
2. On macOS Preview
If you’re a Mac user you can rely on the Preview to enlarge the image without losing quality. Mac comes up with the built-in Preview feature, which is similar to Windows Paint, that lets you enlarge the images without affecting the image resolution even a bit.
Visit the image you wish to resize and launch the photo in the Preview app.
Navigate to the Adjust Size after hitting the Tools button.
After seeing the current size of the image, you can now tap on the Pixels button to select the width and height of the images. You can now input the custom image’s dimensions to increase the resolutions of the images. Once you’re done making the changes to the images, you’ll need to hit the OK button to export the images to the preferred location on your computer
Summary
Learning how to make a picture bigger has turned effortless thanks to the brilliant methods given in this post. The substantial thing to like about the methods is that they won’t mess up with the quality of images. If you want to go for the fast photo enlarging process, FliFlik KlearMax for Photo takes precedence, becoming the best AI-powered photo enhancer. With this tool, you can upscale and enlarge the images by using the automatic AI models.
FAQ:
1. What is the best photo size for printing?
Upon designing the images for the print, knowing about the correct size of the images is paramount. The standard and widely used image size of the print is about 4×6 inches, 5×7 inches, and 8×10 inches.
2. How to increase the resolution of an image?
If you want to increase the image resolution, you can go for the General model in the FliFlik KlearMax for Photo. This amazing tool brings in AI-powered photo enhancing models that help you to enlarge and enhance the image quality automatically.


