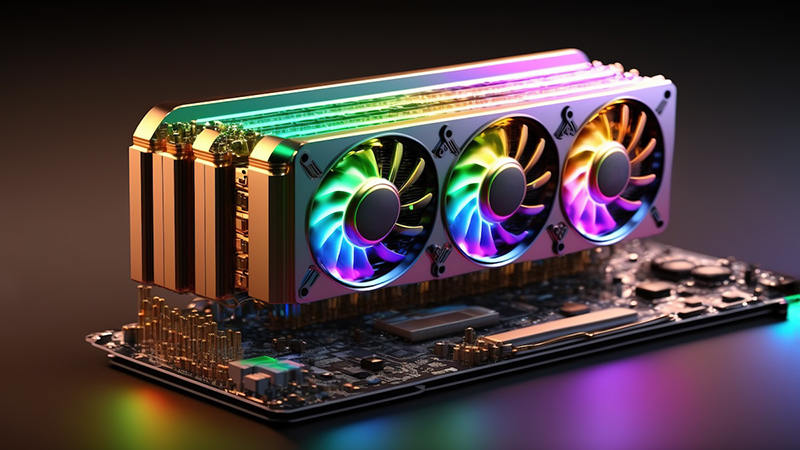
Accelerating Stable Diffusion is a popular text-to-image AI model that can significantly enhance your creative workflow. As AI-generated art becomes more intricate, the computational demands can slow down the process, making efficiency tweaks essential. Whether you’re working on a powerful desktop or a more modest setup, there are practical steps to ensure faster operation without sacrificing output quality. Understanding these methods will help you streamline your creative process and reduce waiting times for image generation.
Method 1: Upgrade Your GPU
Upgrading your GPU can drastically affect what speeds up image generation in Nvidia systems. While upgrading to the latest drivers can seem like an intuitive fix for enhancing performance, many users, especially those using Nvidia GPUs for Stable Diffusion, have experienced slowdowns after updates. For instance, updating from Nvidia driver version 531 to 537 has reportedly increased the image generation time significantly. If performance drops after an update, reverting to an earlier driver version such as 531 may help restore or even improve the speed of image generation tasks.
Method 2: Cross-attention Optimization
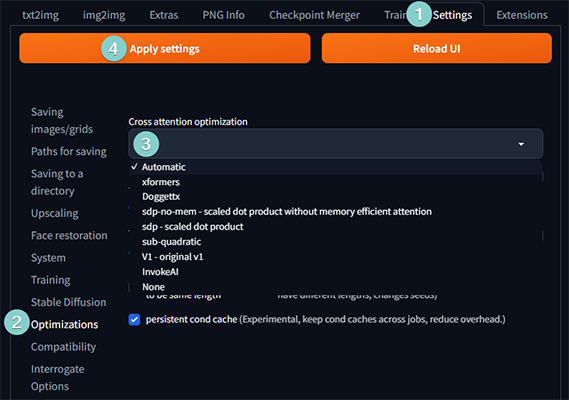
To optimize the speed up Stable Diffusion, cross-attention optimization is a highly effective method. This technique boosts the efficiency of Stable Diffusion’s cross-attention calculations, significantly curtailing processing times without excessive memory demands. Within the AUTOMATIC1111 interface, users can navigate to the Optimization tab and fine-tune the cross-attention settings. Options like Doggettx, xFormers, and Sub-quadratic Attention are available, each designed to accelerate performance in distinct ways. By selecting and applying the optimal setting, users can experience faster image generation without compromising the quality.
Method 3: Token Merging
Another option to speed up Stable Diffusion is token merging. This technique consolidates similar or redundant words in your prompts, effectively reducing the number of tokens the model processes. This leads to faster image generation. However, there is a balance to maintain as excessive token merging can adversely affect the image quality. AUTOMATIC1111 offers settings to control the extent of token merging, typically between 0.2 and 0.5, where 0.2 represents 20% of the tokens being merged. Higher merging ratios can quicken the process but might also degrade the details of the final image.

Method 4: Negative Guidance Minimum Sigma
Sometimes, another technique to speed up Stable Diffusion is using negative guidance minimum sigma. This method involves strategically ignoring minor details in your negative prompts, which instruct the model on what not to generate. By selectively overlooking these details, the generation process can be streamlined. However, the improvements in speed are typically modest, and dramatic reductions in generation time should not be expected. In AUTOMATIC1111, you can adjust this setting by navigating to the Settings page, selecting the Optimization tab, and modifying the Negative Guidance Minimum Sigma value. Increasing this value leads to fewer minor details being considered, which might speed up the process but also increase the risk of unintended alterations in the final image. Compared to token merging, this approach can achieve similar speed enhancements with less impact on the integrity of the generated images.
Method 5: Reduce Sampling Steps
Reducing the number of sampling steps in Stable Diffusion is a straightforward way to speed up image generation. Sampling steps represent the iterations the model goes through to create an image. More steps mean more processing time but often lead to higher quality images. Conversely, reducing the sampling steps can decrease generation time but may also impact the image’s quality negatively.
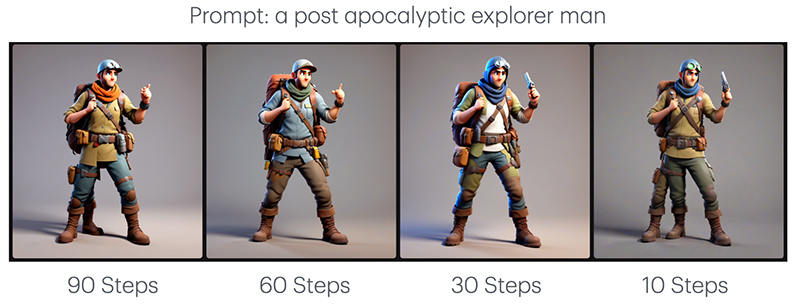
Finding the right balance is key. Tests suggest that a sampling step range of 30-35 strikes a good balance, offering decent image quality while also maintaining a faster generation speed. However, for even quicker results, you can consider lowering the steps to 20-25. This adjustment can significantly speed up the process with minimal quality degradation, making it a viable option for those needing faster outputs without major compromises.
Method 6: Using A Different Web UI
Another strategy to speed up model change from Automatic1111 is by opting for an alternative web interface optimized for faster performance. Automatic1111 is widely used but can lag in certain performance aspects, especially for more demanding tasks. Alternatives like Fooocus, InvokeAI, and DiffusionBee offer streamlined performance specifically for Stable Diffusion, often providing more efficient memory handling and faster image generation times.

Fooocus, for example, is designed with speed in mind and can be an ideal choice if time is a priority. InvokeAI also stands out for its efficient processing and unique tools for managing complex prompts. DiffusionBee caters to macOS users and is optimized for Apple Silicon, ensuring faster generation without overwhelming system resources.
While each alternative may require some time to learn, these UIs can significantly boost productivity by minimizing lag and providing better memory management, helping users achieve faster and more efficient image generation without sacrificing quality.
Method 7: Setting to Smaller Image Dimensions
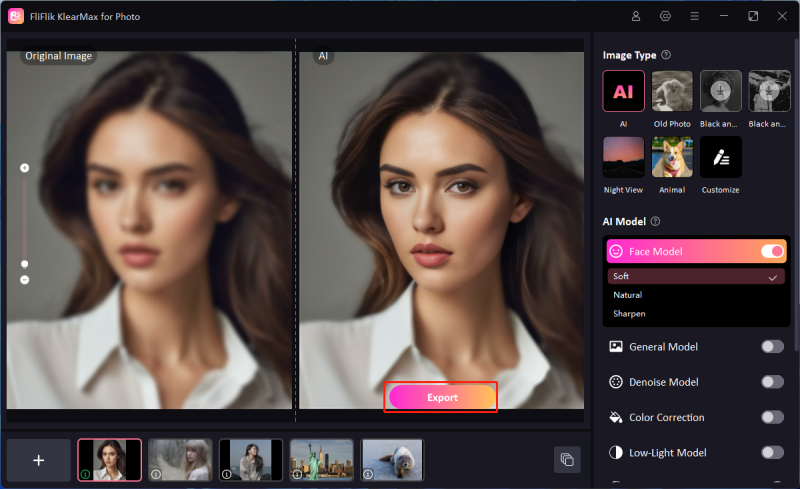
At the end of your Stable Diffusion process, setting smaller image dimensions is a quick way to speed up model change and reduce processing time, though it may impact initial quality. For a clear, detailed final image, you can enhance the reduced-size image with FliFlik KlearMax for Photo. This AI-based tool is designed to upscale and clarify images effectively, allowing you to maintain speed in image generation while ensuring high-quality output for the finished product.
Features
- Uses advanced AI models to enhance photo quality and details automatically.
- Sharpen images affected by motion blur or low focus.
- Resize images based on specific quality requirements.
- Features a user-friendly interface, making it accessible for all skill levels.
To upscale images with KlearMax for Photo:
-
Download and install KlearMax for Photo on your computer.
FREE DOWNLOADSecure Download
Coming SoonSecure Download
-
Import the photos you wish to enhance. Choose the desired AI model and mode based on your photo type. Use the interface to apply enhancements.
![KlearMax AI Models]()
-
After applying enhancements, export the final high-quality image to your preferred location.
![Export the Images]()
Final Words
Making Stable Diffusion faster is achievable through various techniques like reducing dimensions, adjusting sampling steps, and optimizing cross-attention. Each of these methods can enhance efficiency, but for quality enhancement of smaller images, FliFlik KlearMax for Photo is highly recommended. This tool leverages AI to upscale and refine images, combining speed with top-tier quality for your final output.
Coming Soon

