Have you ever admired the artistic effect of motion blur in photos and wondered how to recreate it using just your iPhone? While traditionally associated with DSLR cameras, iPhones are more than capable of achieving stunning motion blur effects, thanks to their advanced camera technology and various apps. In this guide, we’ll walk you through how to take motion blur photos on iPhone, including essential techniques, tools, and apps that will help you capture or even add motion blur after the fact.
What is Motion Blur?
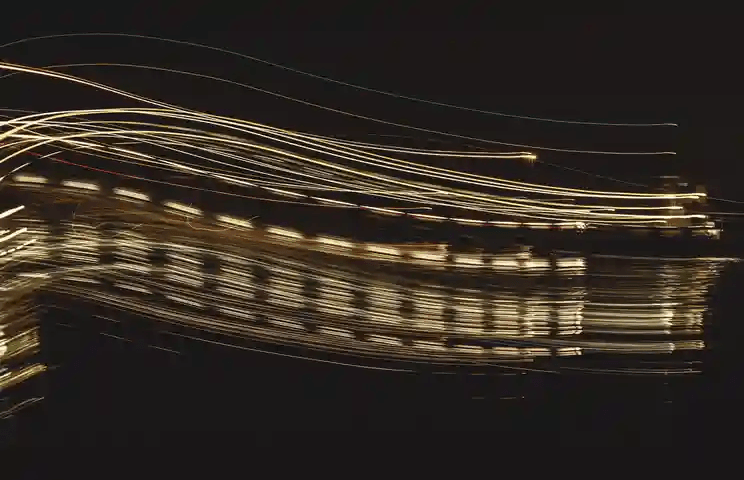
Motion blur is an intentional visual effect where moving objects appear smeared across the image, giving a sense of speed, dynamism, or movement. It’s a result of a slow shutter speed, where the camera sensor remains exposed for longer than usual, capturing the path of a moving object. Motion blur adds energy and drama to photos, making them feel more alive.
Common situations where motion blur can enhance an image include:
-
Waterfalls or waves: Creating a smooth, flowing effect.
-
Light trails: Capturing the path of lights, such as car headlights on a road.
-
Running subjects: Freezing the motion of a person or animal in action.
With the right techniques, you can use your iPhone to create these kinds of motion blur effects.
How to Capture Motion Blur Photos on iPhone
1. Capture Photos in Dark Light
One of the simplest ways to achieve motion blur is to shoot in low-light conditions. Since your iPhone’s camera will adjust to the darker environment by keeping the shutter open longer, moving objects will naturally appear blurred.

-
Step 1: Wait for dusk or shoot in a dimly lit environment.
-
Step 2: Frame your shot, focusing on a moving subject like a car, person, or light source.
-
Step 3: Press the shutter button, and let the iPhone’s camera work its magic. The longer exposure time will blur any movement, creating a stunning effect.
This method is particularly useful for capturing light trails, city traffic at night, or people in motion during twilight hours.
2. Use ND Filters
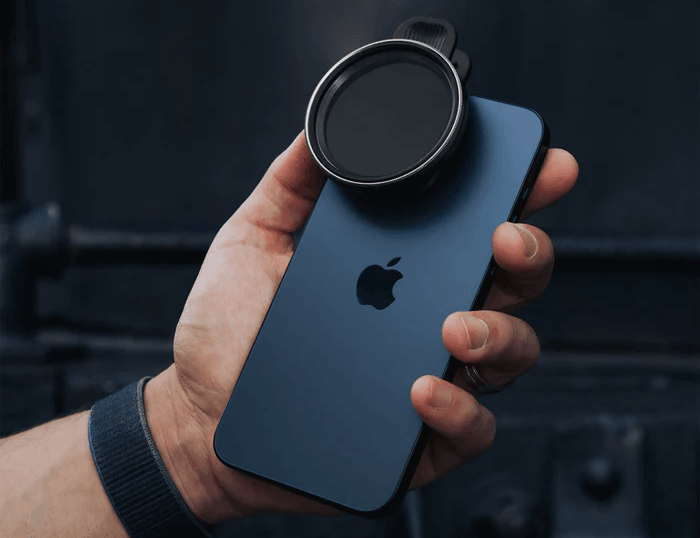
Neutral Density (ND) filters are a secret weapon for achieving motion blur in bright environments. ND filters limit the amount of light entering the camera lens, allowing for a slower shutter speed even in daylight. This is essential for creating motion blur in situations where you can’t rely on low light.

-
Step 1: Purchase a compatible ND filter designed for smartphones. These attach to the camera lens and come in varying strengths.
-
Step 2: Set up your shot in a bright environment, such as a waterfall or busy street during the day.
-
Step 3: Attach the ND filter and adjust the iPhone’s exposure to slow down the shutter speed.
-
Step 4: Capture the shot while your subject moves across the frame. The ND filter will help maintain the proper exposure while still producing the desired motion blur effect.
3. Use Third-Party Apps to Slow the Shutter Speed
Another way to take motion blur photos on iPhone is by using third-party apps that simulate a slow shutter speed. These apps allow you to manually control exposure time, producing beautiful motion blur.
Here are some popular apps that can help:
1. Slow Shutter Cam: This app gives you full control over the iPhone’s shutter speed, helping you capture motion blur, light trails, or moving water.
2. ProCamera: A professional-grade app that offers extended shutter speed control along with other DSLR-like settings.
How to use these apps:
-
Step 1: Download and install the app of your choice from the App Store.
-
Step 2: Open the app and select a slow shutter mode, usually labeled Motion Blur or Light Trails.
-
Step 3: Adjust the shutter speed settings based on your subject’s speed and environment.
-
Step 4: Capture the motion blur by pressing the shutter and holding the phone steady as your subject moves.
These apps give you more creative control over your iPhone camera, enabling you to explore different motion blur effects with ease.
How to Add Motion Blur Effect to Photos on iPhone
Sometimes, you might want to add motion blur to a photo after it’s been taken. Fortunately, iPhones make this easy with built-in features and apps that simulate the effect.
1. For Photos Captured in Live Mode
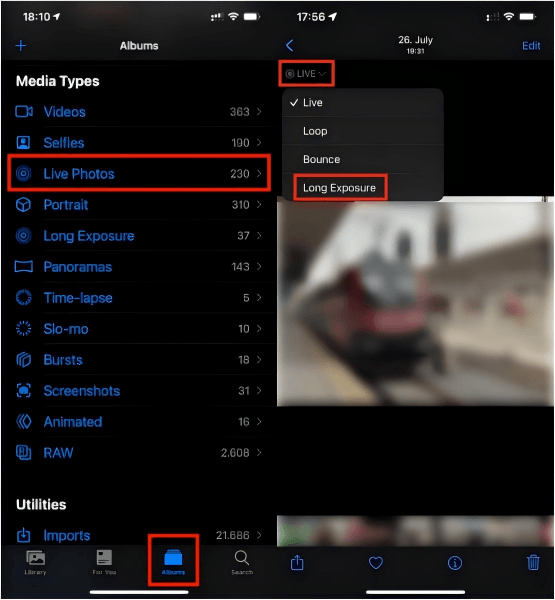
If you use the Live Photos feature on your iPhone, you can turn these mini-videos into long-exposure shots that create motion blur.
-
Step 1: After capturing the photo, open your Photos app. Find the Live Photo you want to edit, then swipe up or tap on the Live icon in the upper-left corner.
-
Step 2: Select Long Exposure from the options. This will blend the frames of your Live Photo, producing a smooth motion blur effect.

This method works perfectly for capturing water movements, crowds, or other fast-moving subjects.
2. For Photos in Normal Mode – Use Apps
If you’ve already taken a photo in normal mode and wish to add a motion blur effect, you can use specialized apps to do the trick.
One popular app for this is Blur Photo Editor, available in the App Store. This app allows you to selectively add blur effects to different parts of your photo.
-
Step 1: Download Blur Photo Editor from the App Store. Open the app and upload the photo you want to edit.
-
Step 2: Use the blur tools to apply motion blur to parts of your photo or the entire image.
-
Step 3: Save the edited photo and enjoy your new artistic creation.
This method is great for adding motion blur to objects like passing cars or running people, even after the shot has been taken.
Easily Remove Motion Blur with AI Photo Enhancer

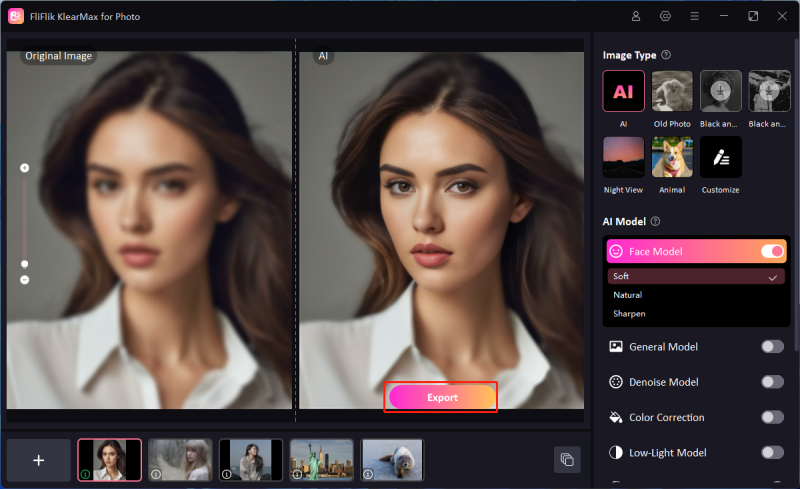
While motion blur is often desirable, there are times when you may want to remove it, especially if it’s accidental. In such cases, using an AI-powered photo enhancer can be a lifesaver. One excellent tool for this is FliFlik KlearMax for Photo, an AI-powered photo enhancer designed specifically for removing unwanted blur from photos.
This is easy to use for anyone as the AI does the heavy lifting. Furthermore, you get access to other useful tools such as the image format converter. This feature allows you to change the image extension seamlessly. Other wonderful features include Denoise, Colorize, Old Photo AI, HD Photo converter, and image enlarger which covers up to 8k.
Using FliFlik KlearMax for Photo is as easy as uploading your blurry photo, letting the AI work its magic, and then downloading the enhanced version. Whether you need to remove blur from portraits or action shots, this tool offers a quick and effective solution.
Conclusion
Now that you’ve learned how to take motion blur photos on iPhone, you can experiment with different techniques and tools to capture stunning, dynamic images. Whether you’re shooting in low light, using ND filters, or leveraging third-party apps, your iPhone is fully equipped to help you achieve the perfect motion blur effect. And if you ever need to edit your images afterward, tools like Live Photos and FliFlik KlearMax for Photo make it easy to add or remove motion blur as needed. Embrace the creative possibilities and start experimenting today!
FREE DOWNLOAD
Secure Download
Coming Soon
Secure Download
