Midjourney has quickly risen as one of the leading tools for AI-driven artwork, producing visually captivating images based on simple text prompts. However, while users can direct Midjourney on what to include, controlling what not to include can be challenging. This is where the concept of a Midjourney negative prompt comes into play, allowing users to exclude undesirable features or elements from their images. By mastering negative prompts, you gain more refined control over your AI art, helping you achieve outputs that are closer to your creative vision.
In this article, we’ll explore what negative prompts are, how to use them effectively in Midjourney, and provide advanced tips to maximize your results.
What are Negative Prompts in Midjourney?
In Midjourney, a negative prompt is essentially an instruction telling the AI what not to include in the generated image. Traditional prompts typically focus on descriptive language to bring certain elements into focus. Conversely, negative prompts refine the output by removing or de-emphasizing specific elements, textures, or features.
For example, if you want an image of a sunset landscape but don’t want the image to include clouds, you could add “clouds:-1” in your prompt. The “-1” signifies a negative weight, directing the model to minimize or avoid that element.
Benefits of Negative Prompts:
- Refinement: Eliminates unwanted details and streamlines focus on desired elements.
- Customization: Fine-tunes image features to match specific stylistic or thematic preferences.
- Enhanced control: Offers creators greater command over the AI output, transforming broad prompts into highly tailored results.
Negative prompts in Midjourney provide nuanced control, enabling users to shape their artwork with precision and avoid unwanted distractions.
How to Use Negative Prompts in Midjourney
To use negative prompts effectively in Midjourney, you’ll need to adjust the prompt weights. This involves designating the positive elements you wish to highlight and the negative elements you want to reduce or remove. Here’s a guide to getting started:
- Start with a Basic Prompt: Describe the elements you want in your image. For example, “an enchanted forest with sunlight filtering through the trees.”
- Identify Unwanted Elements: Determine the elements or features you’d like to avoid. For instance, if you don’t want animals or excessive fog, list those as negative weights.
- Add Negative Weights: To include negative prompts, specify them in your prompt by assigning a negative weight, typically “-1” to “-2.” For example, “an enchanted forest with sunlight filtering through the trees, animals:-1, fog:-1.”
- Fine-tune and Adjust: Run the prompt to see the results and make adjustments. You may need to experiment with weight levels (e.g., -1, -1.5) to get the balance right.
- Experiment with Multiple Negative Prompts: Sometimes, combining multiple negative weights can fine-tune a complex scene. For example, “cityscape at night, neon signs:-1, people:-1, rain:-1.”

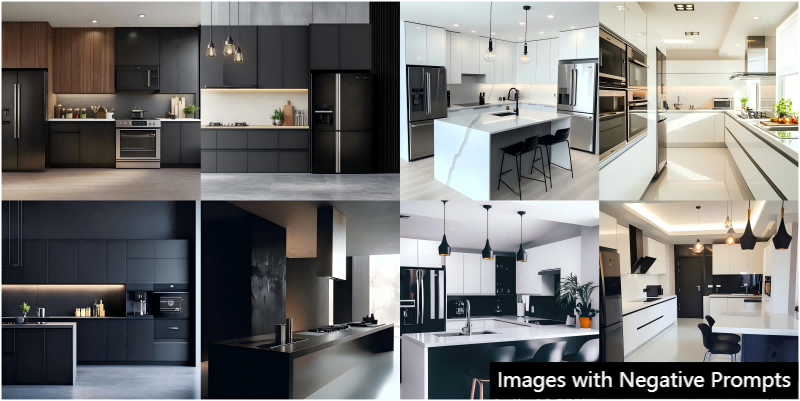
Positive prompt: modern kitchen with sleek appliances and minimalist decor
Negative prompt: clutter:-1, people:-1, bright colors:-2
This allows Midjourney to generate a kitchen scene with a minimalist, uncluttered aesthetic by avoiding people and bright colors, creating a calm, streamlined visual.
Examples of Effective Negative Prompts
Controlling Prominence with Negative Weights
Negative weights control not only the inclusion but the prominence of specific elements. This is particularly useful when certain components add unwanted emphasis to an image. For instance, using the weight “-1” can minimize an element’s impact, while “-2” or lower values further suppress it.

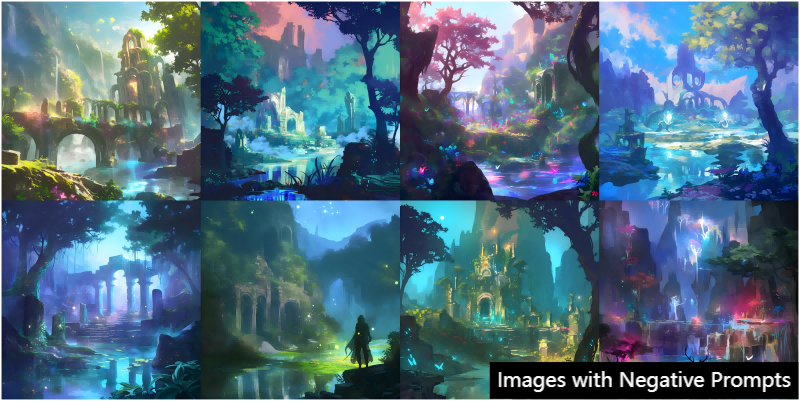
Positive prompt: a fantasy forest with a misty lake, glowing plants, and ancient ruins
Negative prompt: bright colors:-2, animals:-1
With this prompt, the focus remains on the mystic ambiance of the forest, while bright colors and animals are reduced, creating a serene and mysterious atmosphere.
Combining Multiple Prompts for Complex Scene Adjustments
Combining several negative prompts enables even more sophisticated scene adjustments. By balancing both the positive and negative aspects, users can construct scenes that are complex yet focused, avoiding distracting elements that detract from the main theme.

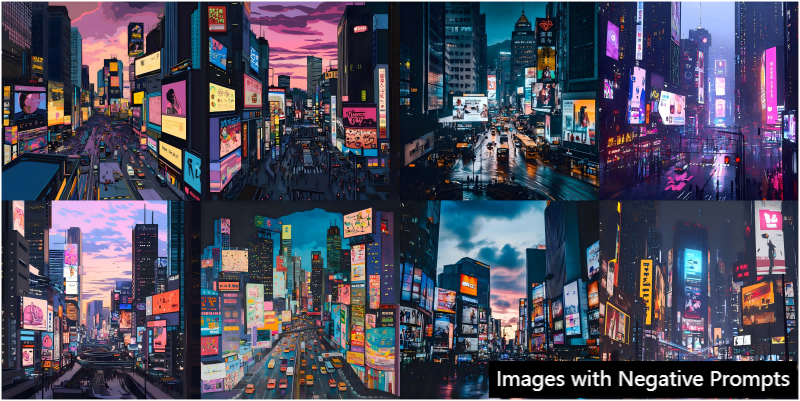
Combined Prompt: A bustling city at twilight with skyscrapers and colorful billboards
Negative prompt: rain:-2, crowds:-1, high contrast:-1
This setup produces a cityscape with subtle, ambient lighting and fewer distractions, avoiding crowds and the overly dramatic effect of high-contrast lighting.
Using multiple prompts in this manner helps achieve nuanced results, as you can subtly de-emphasize various elements without eliminating them completely. The process may take some trial and error, but it provides an opportunity to sculpt intricate images with precise creative control.
Advanced Techniques with Negative Weights
Once you’re comfortable with the basics of negative prompts, try experimenting with advanced techniques using negative weights. These strategies allow for more customized and dynamic outputs, ideal for artists and designers looking to hone specific aspects of their work.
Balancing Negative and Positive Weights
One effective approach is balancing negative prompts with positive weights. For instance, if you want to highlight a particular element but reduce another, you can apply a high positive weight to the desired feature while applying a low negative weight to the less important one.
Prompt: sunlit garden with various flowers
Positive Weights: roses:+2, sunlight:+1.5
Negative Weights: weeds:-1, overexposure:-2
In this prompt, roses are emphasized as the focal point, while weeds and overexposure are minimized, creating a balanced garden scene with natural light and minimized distractions.
Applying Gradient Negative Weights for Subtle Adjustments
Another advanced technique is using gradient negative weights, where different elements are assigned various levels of negative emphasis. This is useful for images requiring specific visual cues to be less prominent without complete removal.
Scene Prompt: forest at dawn with thick trees and fog
Negative Weights: fog:-1, animals:-0.5, bright sun:-1.5
This arrangement creates a misty forest that is slightly foggy and mysterious but not obscured by excessive brightness or animal life.
Experimenting with Negative Weights for Texture and Color Control
Negative prompts are also beneficial for adjusting texture and color. If you’re creating an image that needs a matte look or reduced glare, negative weights can achieve this.
Prompt: vintage car on an open road
Negative Weights: shine:-1, reflections:-1.5
With this technique, the AI produces a matte, vintage look by de-emphasizing shine and reflections, achieving a smoother, subdued style suitable for retro themes.
Image Upscaler for Midjourney

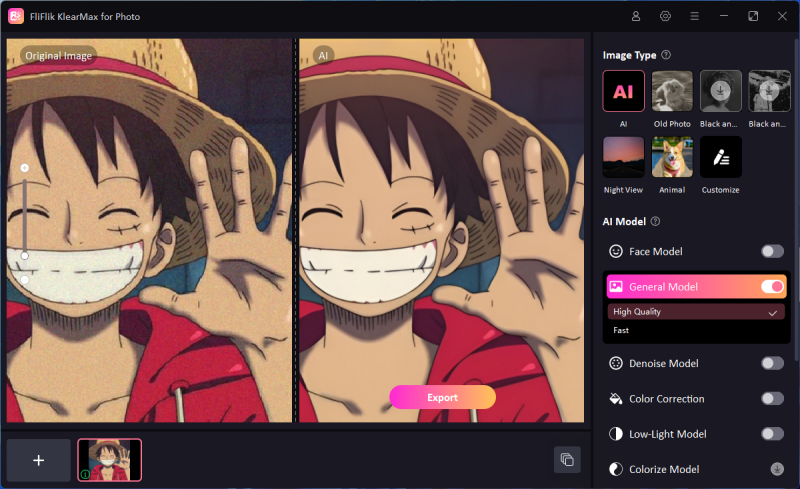
Once your image is rendered in Midjourney, enhancing it further can take your project to the next level. Tools like FliFlik KlearMax for Photo offer image upscaling specifically for photos, allowing you to enlarge and refine the resolution of your AI-generated images without losing detail. KlearMax uses advanced algorithms to upscale images, sharpening textures and lines for a cleaner, high-quality final output.
This is particularly useful for projects that require larger images, such as posters, digital artwork, or even gallery prints. With KlearMax for Photo, you can maintain the quality and intricacies of your Midjourney creations while expanding them to fit any desired format, making it a valuable addition to your AI toolkit.
Conclusion
Mastering the Midjourney negative prompt technique enables artists and designers to control their AI-generated images with exceptional precision. From refining scene details to adjusting textures and avoiding unwanted elements, negative prompts transform simple AI art into polished, curated visuals that meet creative specifications. Whether you’re an enthusiast or a professional, experimenting with negative weights and combining multiple prompts will significantly enhance your Midjourney experience, providing a pathway to achieving high-quality, personalized AI-generated artwork. Tools like FliFlik KlearMax for Photo further empowers users, ensuring that AI-generated images not only meet artistic visions but are also optimized for larger formats and high-resolution applications.
FREE DOWNLOAD
Secure Download
Coming Soon
Secure Download
