If you’re a photographer you must know the art of photography, and learning about all the key aspects of photography will help you to become a successful and professional photographer. The argument of taking the images in landscape mode or portrait mode is taking place amongst the photos graphics, and that’s what this guide is all about.
Tune into the guide to learn about the landscape vs portrait debate’s key points and the main difference between portrait vs landscape.
Landscape VS Portrait: Which is Better?
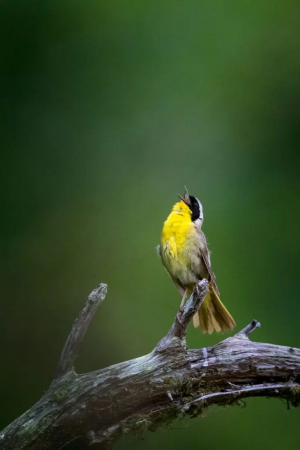
If you’re eager to access the key differences between the landscape vs portrait modes, the good thing is that learning the difference between these terms is simple. The vertical placement of the camera in portrait orientation occurs when the height of the frame exceeds its breadth.
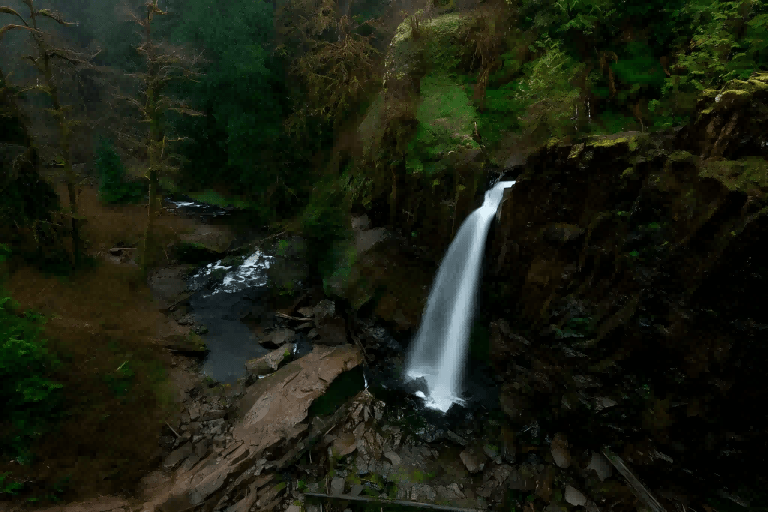
The portrait orientation is often used for capturing the objects or people showing these subjects in the vertical alignment along with emphasizing their height effortlessly. If you talk about landscape orientation, it is the horizontal placement of the image or camera with the height becoming smaller than the width.
When the height of the frame is greater than the width, the camera is positioned vertically in portrait orientation. The direction of the camera is the main difference between landscape vs portrait pictures. When you hold the camera horizontally, it is called the landscape orientation.
On the other hand, holding the camera vertically means that you’re clicking the images in portrait orientation. There is no obvious victor when choosing between landscape and portrait orientations. The type of mode you’re choosing purely depends upon the subject of the picture and what you wish to convey with the photo. Clicking the images in horizontal format blesses you with a greater sense of scale and depth. Vertical format is all about emphasizing the subject’s height. Thus, it comes down to deciding which type of mode you consider better when it comes to landscape vs portrait modes.

How to Use Portrait Orientation
Portrait orientation could be used for creating pictures of the people. Since it aligns with the human form, you can see the emphasis on body language and facial experience. Portrait orientation is commonly used in the vertical designs, including the social media stories, book covers, posters, etc.

Pros
- Portrait orientation is perfect for clicking the subject’s height making it perfect for tall objects or full body portraits
- It decreases the distractions to enhance the attention on the subject from the background
- Supports the mobile phone viewing as the majority of the mobile screen are held vertically
Cons
- Since it comes up with the limited width, it could become a challenge to click the scenes of multiple subjects simultaneously
- You’ll need to opt for the careful composition to prevent the cropping of important details
How to Use Landscape Orientation
With Landscape orientation, you can capture the sweeping broad scenes like seascapes, landscapes, and benches of people. The landscape orientation is also appropriate for the cinematic compositions when you intend to portray a movement or space.

Pros
- Landscape orientation is absolutely perfect for showing the wide scenes helping you to include more elements in the frame
- It allows you to produce the sense of the space, making it look elegant did the architectural and landscape photography
- Landscape orientation works excellent for horizontal displays including the televisions and monitors
Cons
- The composition could come up with more background than required
- Doesn’t sit well on vertical layouts or vertically orientated screens
How to Set Landscape Mode and Portrait Mode on Camera
After learning about the main difference between landscape vs portrait, if you want to set the landscape mode and portrait mode on camera on the iOS and Android devices, you don’t have to put in extra effort to do it. Follow the step-by-step guide below to switch through the two orientations on your iOS device or Android device.
On iOS Device
-
Step 1: To begin with, you’ll need to start the camera app.
-
Step 2: You can now rotate the iOS device to switch between the landscape and portrait modes. The orientation of the screen will be adjusted automatically, and you’ll be able to select the portrait or landscape mode before taking the pictures on the iOS device.
On Android Device
-
Step 1: Launch the camera app on the Android device to start the proceedings.
-
Step 2: You must rotate the smartphone at this step to switch between landscape and portrait mode. The screen orientation won’t need to be worried about because it will be changed automatically.
How to Change the Orientation of a Photo
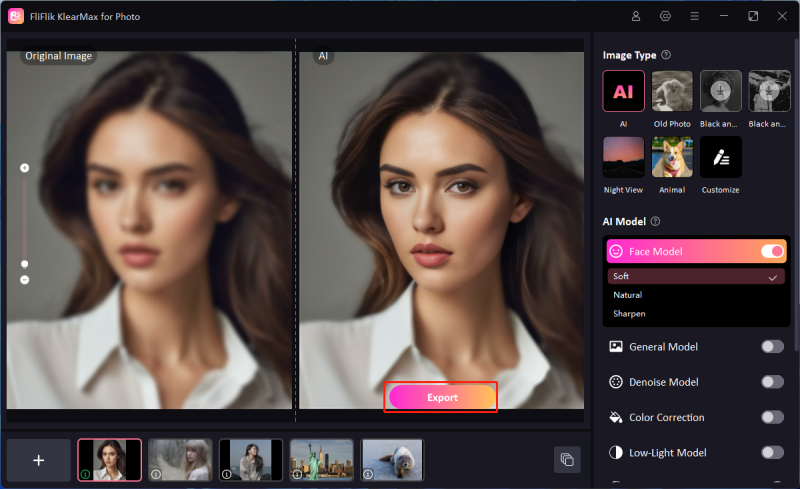
The success and appearance of your images depend upon the direction in which you’ve clicked the images. Creating the photos in horizontal or vertical angles is important but what if you want to click the images vertically to make the images look clearer and outstanding? The problem with various tools that allow you to change the orientation of the images is that they could end up affecting the quality of the images. Fortunately, that’s where FliFlik KlearMax for Photo steps in and empowers you to customize the orientation of the images and make it by your requirements.
The thing to like about the FliFlik KlearMax for Photo is that apart from changing the orientation of the images also enables you to enhance the quality of images significantly. With FliFlik KlearMax for Photo, you can now explore the 5 new AI models to ensure that you can polish and improve the credentials of the images in a better manner than before.
On top of that, FliFlik KlearMax for Photo also empowers you to adjust the resolution of the images according to the mobile or computer screen, and it also helps you to process multiple images simultaneously.

In Conclusion
The debate of landscape vs portrait is heating up, and rightly so as these two photography modes can help you to take the images amazingly and outstandingly. With Landscape orientation, you’ll be able to click the images horizontally, while the portrait orientation empowers you to click the images vertically.
After looking at his comparison of the landscape vs portrait pictures, you can decide which photography modes suit you the most. FliFlik KlearMax for Photo could be your favorite and most reliable way to alter the orientation of the images and while changing the orientation of the images, this remarkable tool doesn’t affect the quality of the images. Apart from offering a simple user interface, it supports batch processing.
FREE DOWNLOAD
Secure Download
Coming Soon
Secure Download
