When you work with pictures in Adobe Illustrator, you often need to change their size to fit your design just right. Whether you’re adjusting a logo, graphic, or any image, resizing is an important skill that ensures your visuals look good. Illustrator has different tools and techniques to make this process easy and efficient. From adjusting image dimensions to scaling objects proportionally, knowing how to resize images in Illustrator can greatly improve your projects. In this article, we’ll guide you through the steps and tips for effectively resizing images and helping you achieve the desired size and resolution.
Will Resizing Image In Illustrator Degrade Image Quality?
The image quality may be affected if users force expand an image in Illustrator. This is because additional pixels need to be created to fill the larger size, which can result in a loss of sharpness and make the image appear blurry or pixelated. Conversely, when you shrink an image, pixels are removed, which generally preserves quality and maintains sharpness. It’s important to start with a high-resolution image and use the right resizing tools to minimize any quality loss.
How To Resize Image In Illustrator
When working on a project, it’s important to know how to resize page in Illustrator to fit specific dimensions. You can use techniques like the Scale Tool, Bounding Box, or Transform Panel to achieve the best results. Whether you need to scale an image to fit a new layout or adjust it for various formats, Illustrator allows others to resize images without losing quality. Here are some methods to ensure your images look sharp and professional.
1: Using the Scale Tool
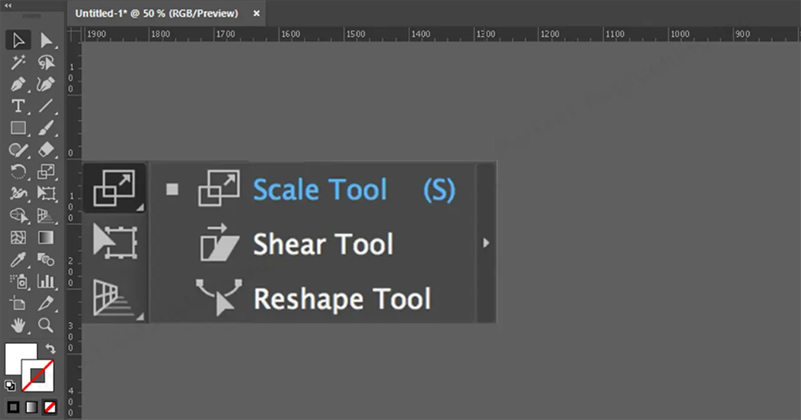
The Scale Tool in Illustrator is an easy way to resize images and objects precisely. It allows you to make items larger or smaller while maintaining their proportions, which is important for resizing images in Illustrator without distorting the original design.

Here is how to resize image in Illustrator without losing quality using the scale tool:
- Begin by clicking on the image or object you want to resize. Ensure that it is selected so that the Scale Tool can be applied.
- Locate the Scale Tool in the toolbar or press the shortcut key ‘S..’. Click on the tool to activate it.
- Click and drag on the image to scale it up or down. Hold onto the Shift key to maintain the aspect ratio and ensure the image is not distorted.
- Double-click on the Scale Tool icon to open the Scale dialog box. Enter a specific percentage to resize the image precisely, and then click OK to apply the changes.
2: Using the Bounding Box
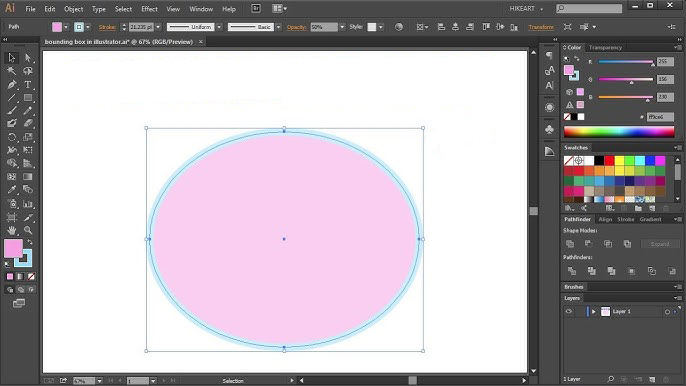
The Bounding Box tool in Adobe Illustrator is a useful feature that lets you visually resize images and objects directly on the canvas. It displays a set of handles around the selected object, allowing you to click and drag them to adjust the size and proportions of the object.

Here is how to resize image in Illustrator using the bounding box:
- Click on the image or object to select it. Ensure that the bounding box appears around the selected item.
- Now, click the handles of the bounding box and drag them to adjust the size of your image. Make sure to hold onto the shift key to maintain the original proportion.
- As you drag the image, carefully notice the changes to fit your requirements. Finally, release the cursor to apply a new size.
3: Using The Transform Panel
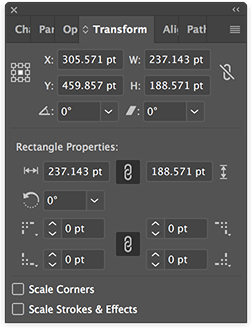
The Transform Panel in Illustrator gives you precise control over resizing images. It is ideal when you need exact measurements. With it, you can enter specific values for width and height, making it easy to get accurate results.

Here is how to resize image in Illustrator using the transform panel:
- Go to Window > Transform to open the Transform Panel if it is not visible.
- Click on the image or object you want to resize to ensure it is selected.
- In the Transform Panel, you can enter new width (W) and height (H) values. Ensure the chain link icon between the width and height fields is selected to maintain proportions.
- To apply the new dimensions, press Enter or Return. The image or object will resize based on the values you specified.
How To Resize And Enhance Images Easily Without Quality Loss
When resizing and improving images without losing quality, it’s important to have the right tools. KlearMax for Photo is a great solution for this. It is designed to keep images sharp and clear while making various adjustments. Moreover, it combines powerful resizing with advanced enhancement features.

Its smart algorithms ensure that images keep their original clarity and detail, even when resized or edited. KlearMax for Photo also adjusts your images for high-resolution prints.
Features
- Allows you to resize images without compromising on detail or sharpness, ensuring your images look crisp and clear.
- It provides tools to adjust brightness, contrast, and sharpness to enhance the overall quality of your images.
- Reduces unwanted noise and artifacts, resulting in smoother and more professional-looking photos.
- It offers an intuitive interface that makes it easy to apply adjustments and enhancements, even for beginners.
Steps to Use KlearMax for Photo
-
Download and install the program. Launch KlearMax for Photo and load the image you want to resize by clicking “Select Images”.
FREE DOWNLOADSecure Download
Coming SoonSecure Download
-
Go to the resolution tool at the bottom right corner. Enter your desired dimensions to adjust the size while maintaining the image’s quality. Use enhancement tools like the face and general models to adjust brightness, contrast, and sharpness as needed.
![KlearMax AI Models]()
-
Once satisfied, save your image by selecting “Export” to save the images.
![Export the Images]()
Conclusion
Knowing how to resize images in Illustrator is important for anyone working with graphics and design. Different methods, such as the Scale Tool, Bounding Box, or Transform Panel, offer unique image adjustment benefits. However, if you need additional support for resizing and enhancing images beyond Illustrator, consider using FliFlik KlearMax for Photo. It provides advanced features to keep your images sharp and clear, even when making significant adjustments.
Coming Soon


