If you’ve created the images to upload them on social media, the requirements of the social media might ask you to resize the images.
Stretching or increasing the resolution of the images is common, and enhancing the resolution of the photos could also help you make them elegant and worth watching. Tune into post to learn how to stretch a photo on Windows, Mac, and iOS device.
Part 1. How to Stretch a Photo on Windows
Windows has developed an amazing Photos App that helps you resize images quickly. This implies that stretching the images on Windows is only a couple of moments away, and what you need to do here is follow the steps given below to learn how to stretch out a photo on Windows.
Launch the picture you wish to resize with the Photos App. If you’ve set Photos as the default viewing app, you can double press the photo to launch it with the Photos App. You can also right-click the image before hitting the Open with Photos button.
![Strench the Image]()
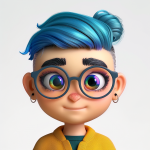
Click more icons and hit the Resize icon.
![Resize Image on Windows]()
Now, you can access several photo options on Windows and select Best for profile pictures and thumbnails to stretch the images.
![Best Size Image On Windows]()


Part 2. Easily Stretch a Photo on Mac
If you want to learn how to stretch a photo on macOS, the preview, which is a built-in app of Mac, can help you enhance the resolution of the images. While resizing the images, Preview tends to maintain the original quality, but it doesn’t support the batch processing, so stretching multiple images at the same won’t be possible.
Choose the Open option after right pressing the photo. If you don’t use the Preview as the default image viewer, choosing Open with Preview is recommended.
Press on the Tools button and choose the Adjust Size button afterward.
In this phase, you’ll need to enter the desired height and width of the images. You can also use the arrow to choose the preset size, allowing you to change the resolution effortlessly. Confirm the photo size by hitting the OK icon and then selecting the File button after saving the resized image. Choose the Save button to save all the changes.
![Preview image on Mac]()

Part 3. How to Stretch a Photo Vertically on iPhone
iPhone brings in the Image Size app that empowers you to learn how to stretch a photo on iPhone. Despite being a mobile app, it doesn’t affect the image quality while changing the resolution of the images, but some people have complained that the tool took longer than usual to resize an image.
Launch the image size app and press the photo icon.
![Image Size App]()
After clicking the Allow Access to All Photos icon, you’ll need to import the photo you wish to resize by hitting the Choose button.
Navigate to the Height and Width text boxes and type in the picture’s new size values. You can now see the height and width size on the screen.
![Customize Size]()
If you’re satisfied with the images’ results, you’ll need to hit the Download button, which will help you export the images to the preferred folder on your iOS device.
![Download the image]()


Part 4. How to Stretch a Photo without Losing Quality
The tools we’ve listed above to stretch a photo could affect the overall image quality and might take extra time editing the credentials of the images. Fortunately, FliFlik KlearMax for Photo supports batch processing, meaning it allows you to stretch multiple images simultaneously. While modifying the resolution of the images, you won’t see the quality of the photos get messed up.
It brings in the three amazing Photo enhancing AI models, including the Face Model, General Model, and Denoise model, to enhance the reputation of the images automatically.
How to stretch a photo via FliFlik KlearMax for Photo?
Tap on the Download button to download the software. Once you’re done downloading the software on the your computer, you’ll need to install and then launch it afterwards.
FREE DOWNLOAD![secure download]() Secure Download
Coming Soon
Secure Download
Coming Soon![secure download]() Secure Download
Secure Download
Reach to the main interface of the FliFlik KlearMax for Photo and then hit the Select Images button to upload the photo you wish to enhance the resolution of.
![Select Photos]()
Now, you can see the 3 glittering AI models, all of which contain 6 amazing modes. The face model is there for portrait images as it prompts the soft model that lets you retouch the photos with colorization and improvements.
It prompts the high-quality mode, which allows you to modify and increase the resolutions of the images, making the photos look gigantic and flawless.
![Different AI Models on KlearMax]()
After stretching the images and increasing the resolution of the images, you’ll need to preview the images. Doing so will help to make some changes to the images if you aren’t satisfied with the outcome of the images. You must click the Export option once you’re satisfied with the image’s overall outcome.
![Set Export Path]()


Conclusion
While stretching a photo, multiple tools could affect the image quality, so all the fuss makes changing the size of an image useless. Fortunately, we’ve listed stunning ways to help you know how to stretch a photo on a Mac, Windows, or iOS device, and all the options are surely worth your attention. Stretching or enlarging images without losing the original image is only a couple of moments away, thanks to the remarkable features of the FliFlik KlearMax for Photo. It enables you to raise the resolution and general quality of the photographs.
Hey everyone! I'm Ivan Davis, and I'm passionate about using AI to streamline my workflow in the voice changer industry. So excited to empower users by changing the voice to any voice they want!