Often, users encounter the persistent and distracting “Activate Windows” watermark on their screens, prompting them to search for solutions on how to remove Activate Windows watermark permanently. This watermark appears when your Windows operating system is not properly activated, and it can interfere with your user experience. Fortunately, there are effective methods to remove it. In this guide, we will explore four reliable ways to eliminate the watermark, ensuring a cleaner and more professional look for your desktop. Follow this guide to restore your screen to its original condition.
Why am I getting an Activate Windows Watermark?
The “Activate Windows” watermark appears when your copy of Windows isn’t activated or is using an invalid license. This often occurs if you haven’t entered a valid product key, if there’s a problem with the activation servers, or if you’re using an unauthorized or pirated version of Windows. Ensuring your Windows copy is legitimate and properly activated will prevent this persistent reminder from appearing on your screen.
How to Remove Active Windows Watermark Temporarily?
If you need to remove the “Activate Windows” watermark temporarily, KleanOut for Photo is the perfect solution. This AI-powered tool can easily remove the watermark from your screenshots, giving them a cleaner and more professional appearance.

KleanOut for Photo offers several features to enhance your images, including AI watermark removal, background removal, unlimited custom watermark additions, and the ability to edit watermark size, location, and transparency. Follow these simple steps to use KleanOut for Photo and improve your images effortlessly.
Features
- The AI watermark remover automatically detects and removes watermarks from images.
- You can remove the background from images easily, making them more versatile.
- Add watermarks without limitations, allowing you to customize them as you wish.
- Edit the watermark’s size, location, and transparency to fit your needs perfectly.
To remove Activate Windows Watermark with KleanOut:
Download and install KleanOut for Photo on your PC. Once installed, launch the application and select “Remove Watermark from Image” from the main interface.
FREE DOWNLOADSecure Download
FREE DOWNLOADSecure Download
Click on the “Import” button or drag and drop the image with the watermark into the application. This will load the image into the workspace. Navigate to the toolbar and select the Activate Windows watermark. Adjust any settings if necessary to ensure complete removal.
![kleanout for photo remove watermark]()
After the watermark has been removed to your satisfaction, click on the “Export” or “Export All” button to save all the pictures.
![export image with watermark removed kleanout for photo]()
How to Remove Active Windows Watermark Permanently
Struggling with the persistent Activate Windows watermark keeps coming back? This section will show you how to remove it permanently, ensuring it never disrupts your screen again. Follow these steps to effectively resolve the issue and enjoy a cleaner desktop experience.
🔘 1: Using Services
One effective method on how to remove Activate Windows 10 watermark and how to get rid of Activate Windows watermark Windows 11 is by using the Services tool. This approach involves disabling a specific service responsible for displaying the watermark.
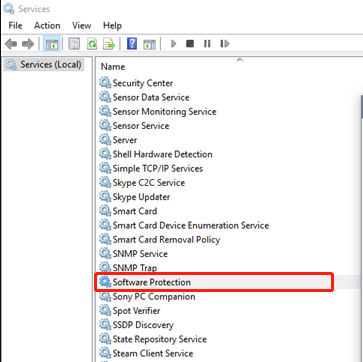
Step 1: Press Windows + R to open the Run dialog box, type services.msc, and hit Enter to launch the Services window.
Step 2: In the Services window, scroll down to find the “Windows License Manager Service”. Double-click on it to open its properties.
Step 3: In the properties window, set the Startup type to “Disabled”. Then, click on the “Stop” button to stop the service immediately.
Step 4: Click “Apply” and then “OK” to save the changes. Restart your computer to ensure the watermark is removed.
🔘 2: Using Notepad
Another simple and effective method on how to get rid of Activate Windows watermark is by using Notepad to create a batch file that modifies the system registry. This process can help remove the watermark from your screen permanently.
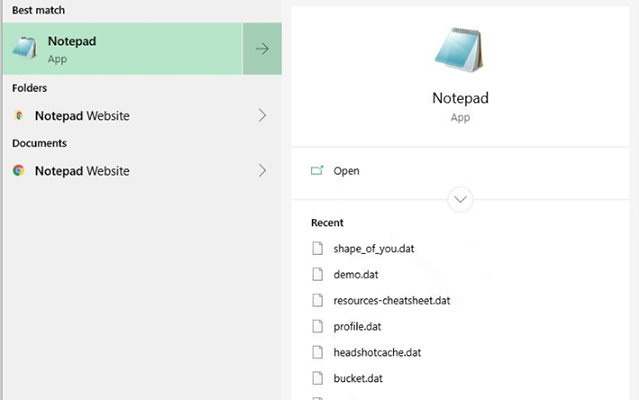
Step 1: Press Windows + S, type “Notepad”, and press Enter to open the Notepad application.
Step 2: Copy and paste the following code into Notepad:
plaintext
Copy code
@echo off
taskkill /F /IM explorer.exe
explorer.exe
Exit
Step 3: Save the file with a .bat extension. For example, name it RemoveWatermark.bat. Ensure the “Save as type” is set to “All Files”.
Step 4: Right-click on the newly created batch file and select “Run as administrator”. This will execute the commands in the batch file, which should help remove the watermark.
🔘 3: Using Registry
To address how to hide Activate Windows watermark, you can use the Registry Editor to make specific changes. This method involves modifying a registry key to hide the watermark from your screen.

Step 1: Right-click on the Start button and select “Run” from the context menu. Alternatively, press Windows + R to open the Run dialog box.
Step 2: Type “regedit” (without quotes) into the Run dialog box and hit Enter. This will open the Registry Editor.
Step 3: In the Registry Editor, expand the folders on the left side by navigating to HKEY_CURRENT_USER > Control Panel > Desktop.
Step 4: Locate the PaintDesktopVersion entry in the right pane. Double-click on it, change the value data from 1 to 0, and click “OK”.
🔘 4: Activate Windows
The most straightforward and permanent solution to remove the “Activate Windows” watermark is to properly activate your copy of Windows. This method involves entering a valid product key to officially activate your operating system.
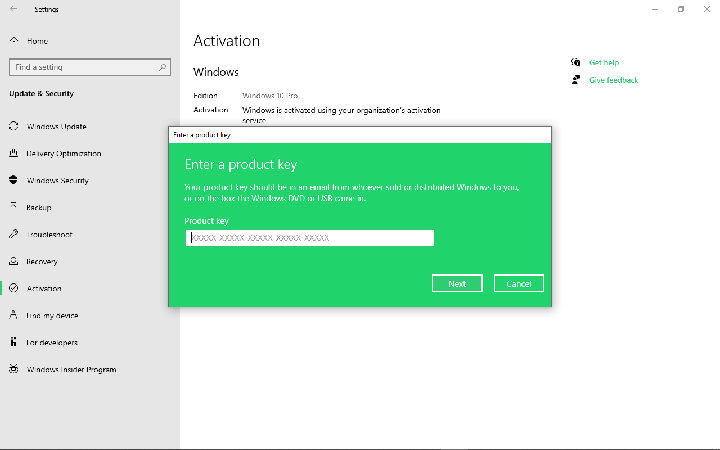
Step 1: Press Windows + I to open the Settings app. Alternatively, you can click on the Start menu and select “Settings”.
Step 2: In the Settings app, navigate to Update & Security > Activation. Here, you’ll see the option to activate Windows.
Step 3: Click on “Change product key” and enter a valid 25-character Windows product key. This key can be found on the packaging of your Windows copy, in your email if purchased online, or on a sticker on your device.
Step 4: After entering the product key, click “Next” and follow the prompts to complete the activation process. Once Windows is activated, the watermark will be permanently removed.
FAQs about Activate Windows Watermark
Q1: Is it possible to hide the activate windows watermark?
Yes, it is possible to hide the “Activate Windows” watermark temporarily using methods such as editing the registry or using third-party tools. However, these methods do not provide a permanent solution and might require repeated actions to keep the watermark hidden.
Q2: How to remove activate windows watermark Windows 11 without product key?
To remove the “Activate Windows” watermark in Windows 11 without a product key, you can use methods like editing the registry, using the Services tool to disable the Windows License Manager Service, or running a batch file through Notepad. These methods can hide the watermark but are not permanent solutions.
Q3: hy does the Activate Windows 11 watermark keep coming back?
The Activate Windows 11 watermark keeps coming back because the operating system remains unactivated or is using an invalid license. To permanently resolve this issue and achieve a complete Windows 11 activate windows watermark remove, you must activate Windows with a valid product key.
Summary
You can remove the “Activate Windows” watermark using various methods, including modifying system settings, using Notepad, editing the registry, or activating Windows with a valid product key. For a temporary and easy solution, try KleanOut for Photo, which effectively hides the watermark in your screenshots. This tool is highly recommended for quick fixes on how to remove Activate Windows watermark.

