Explore the step by step to swap faces with KlearMax for Photo. If you have any question, please do not hesitate to contact us.
Swapping faces is the new feature of KlearrMax for Photo, it makes easy to change the face of individual person or multiple people. Here’s the step-by-step guide to change the face.
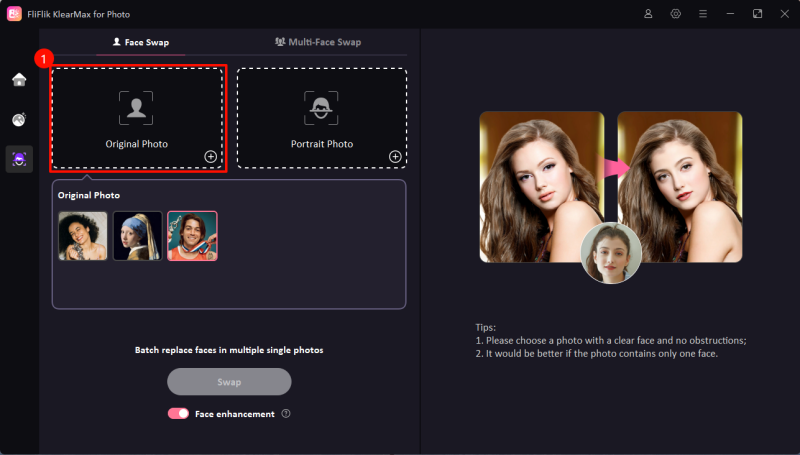
After launch FliFlik KlearMax for Photo, you can select the AI Face Swap section.
Select the photo containing the face you wish to replace. Ensure the image is clear and well-lit for the best results.
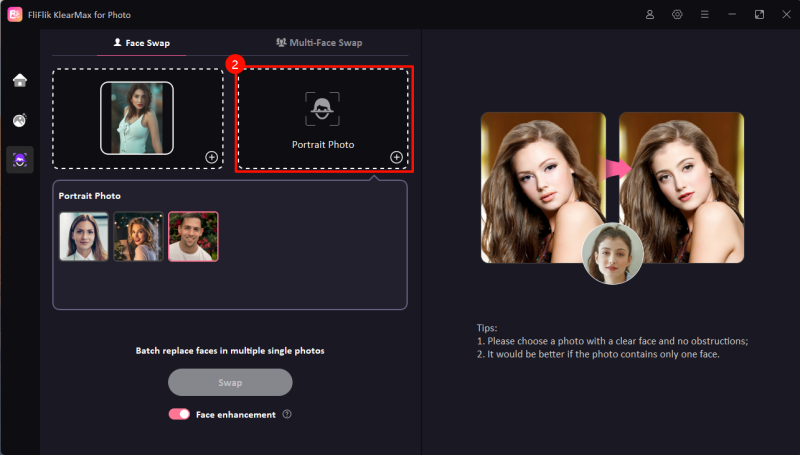
Choose another image with the face you want to use as the replacement. This can be a celebrity, a friend, or any desired face.
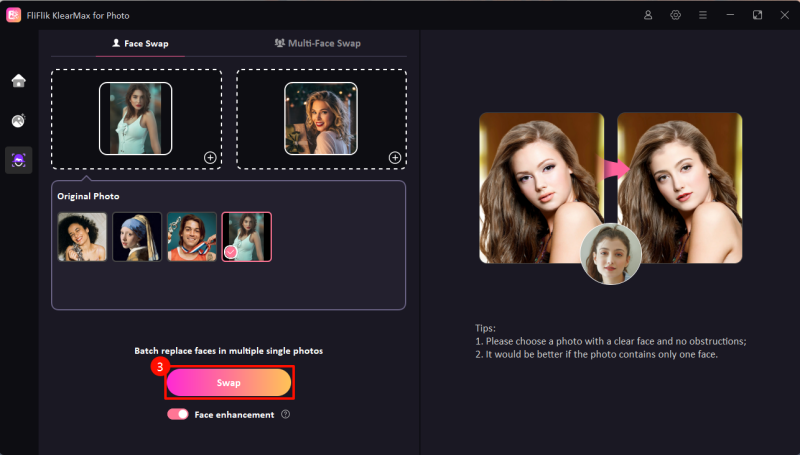
Click on the Swap button to initiate the face-swapping process. The AI will seamlessly merge the selected face onto the original image.
You can turn on the Face Enhancement feature for a better portrait, but the process might be slower depending on your computer’s performance.
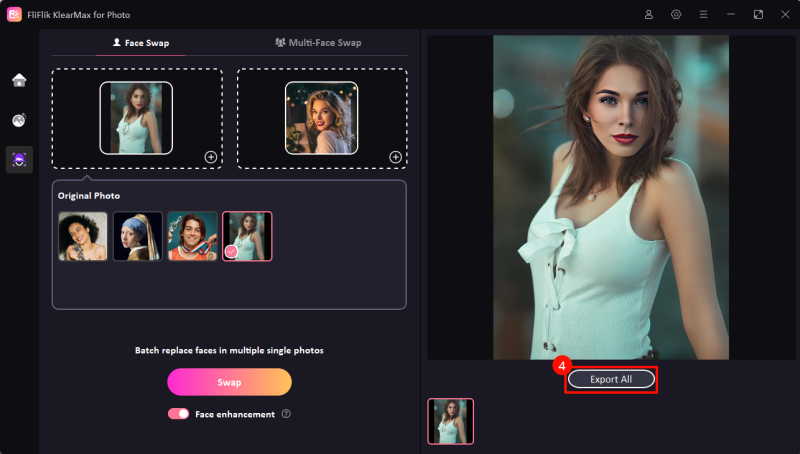
Review the final result. If it meets your expectations, export the edited image and share or save it as needed.
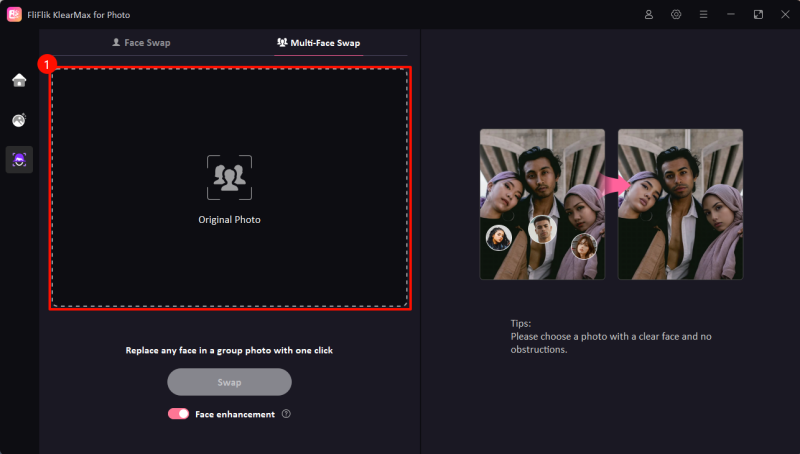
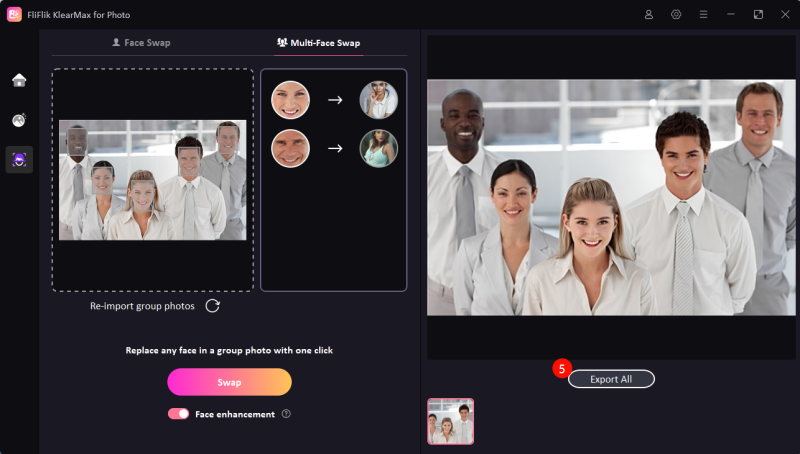
Import a group photo or an image with multiple faces you want to edit. Ensure the image is clear and well-lit for the best results.
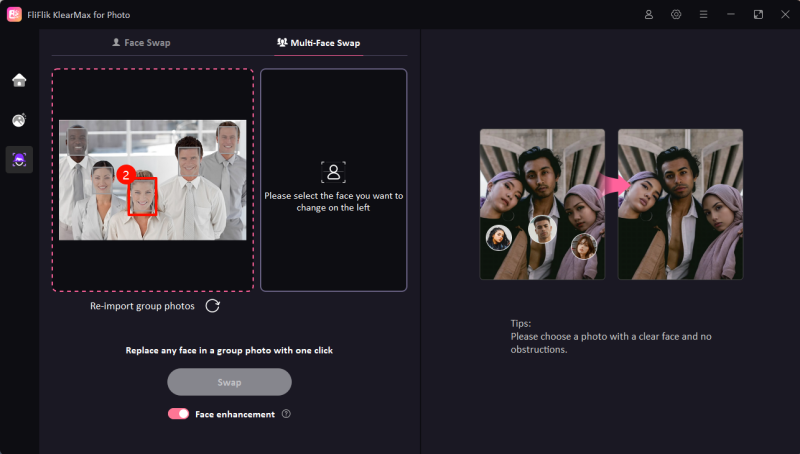
The software will automatically detect all the faces in the image. Manually select the faces you want to replace to ensure precision.
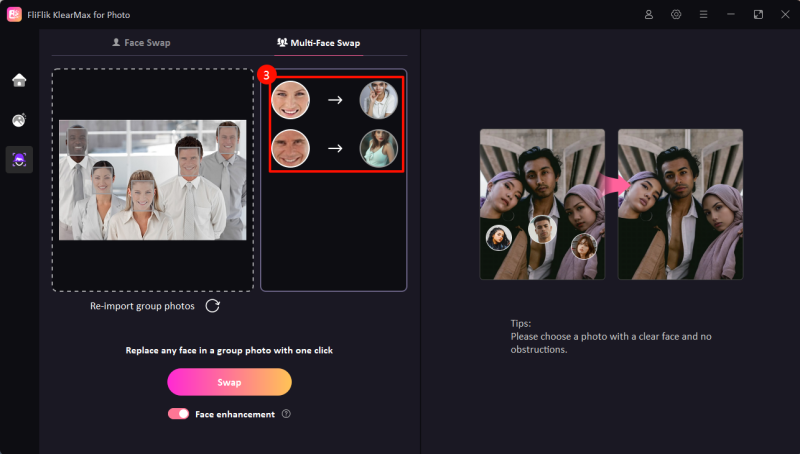
Add new face images for swapping. These can be of celebrities, friends, or even your own collection. You can upload multiple target face images to replace different individuals in the source photo.
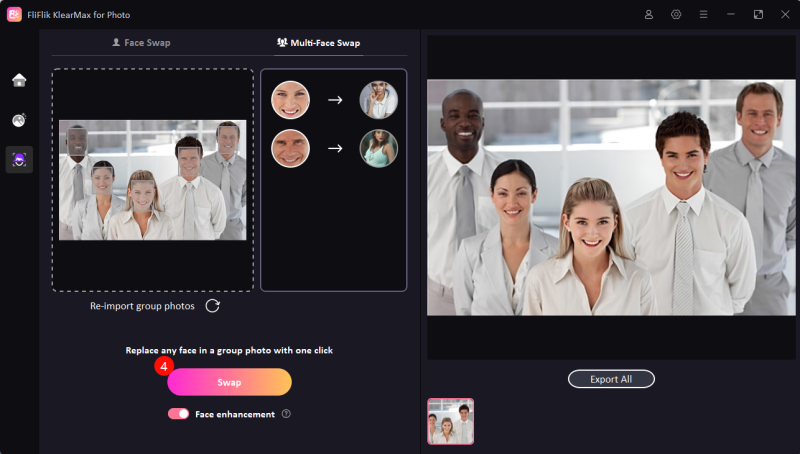
Once satisfied with your selections, click the Swap button. Wait for the software to process the image and swap faces seamlessly.
You can turn on the Face Enhancement feature for a better portrait, but the process might be slower depending on your computer’s performance.
Review the swapped image and save it in your PC. Use the batch save feature for projects involving multiple images.

