Q1
Voice Changer has no sound/very low sound
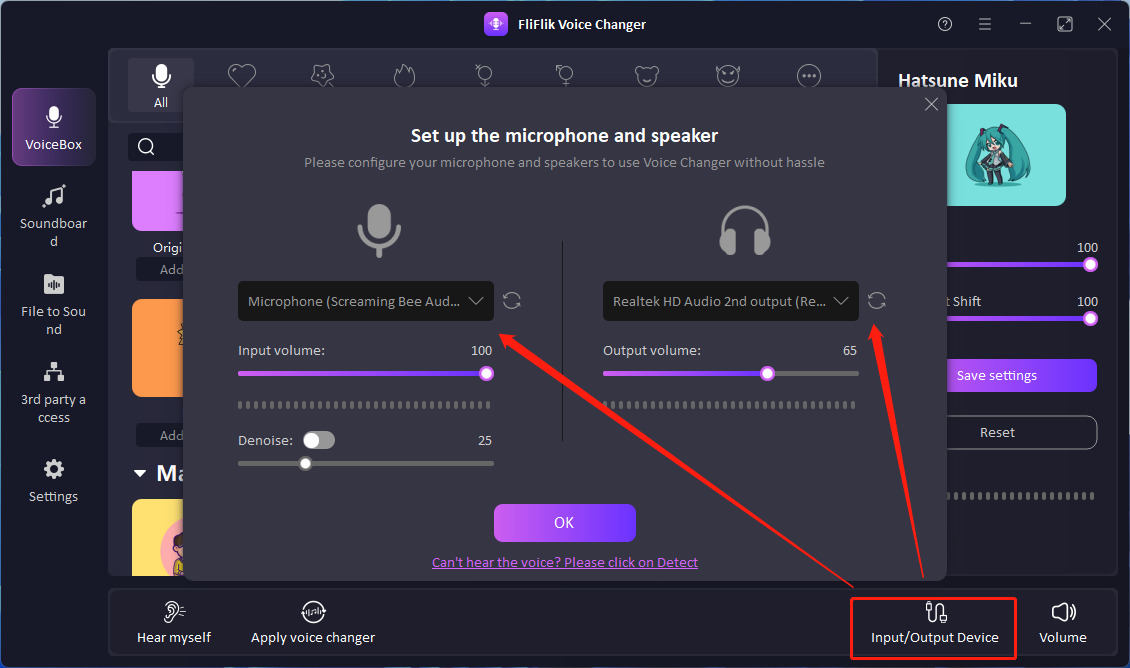
1. Click the “Input and Output Devices” of the voice changer and select the microphone and headphone device you are using from the drop-down menu.
2. If the sound is too low or even no sound
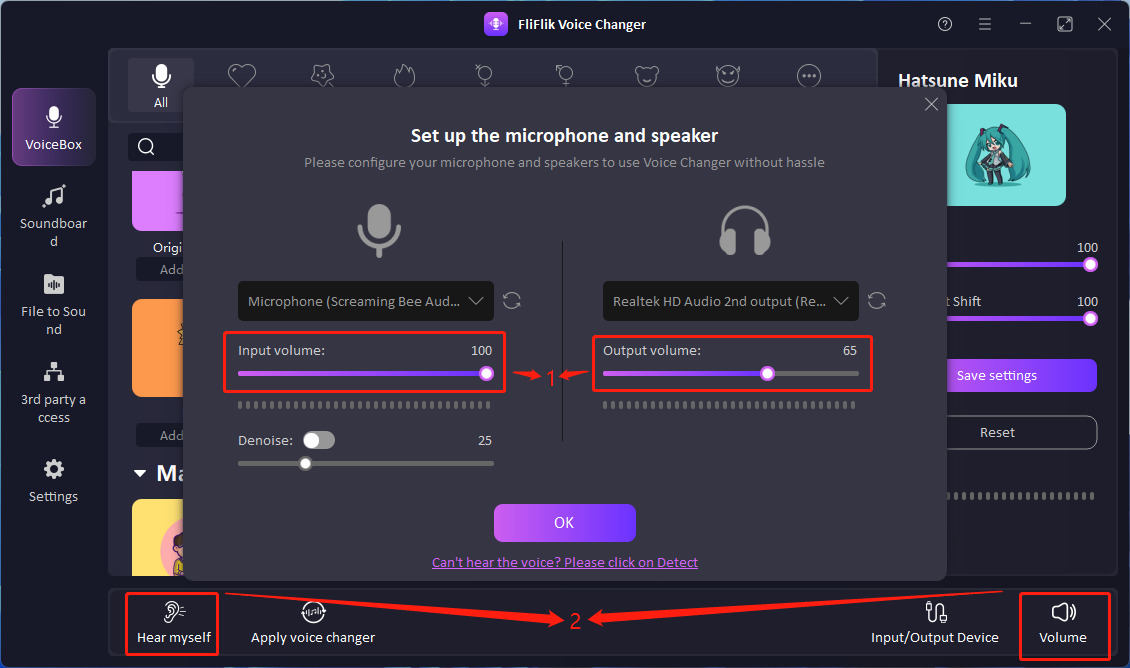
Please adjust the volume controls for the microphone and headphones (labeled as “1” in Figure 2). If set up correctly, the audio volume detection bar should change as you increase or decrease the volume.
3. If you speak without sound
Make sure that the volume buttons (labeled as “2” in Figure 2) and the “Hear myself” button (also labeled as “2” in Figure 2) are turned on.
4. If you cannot change your voice
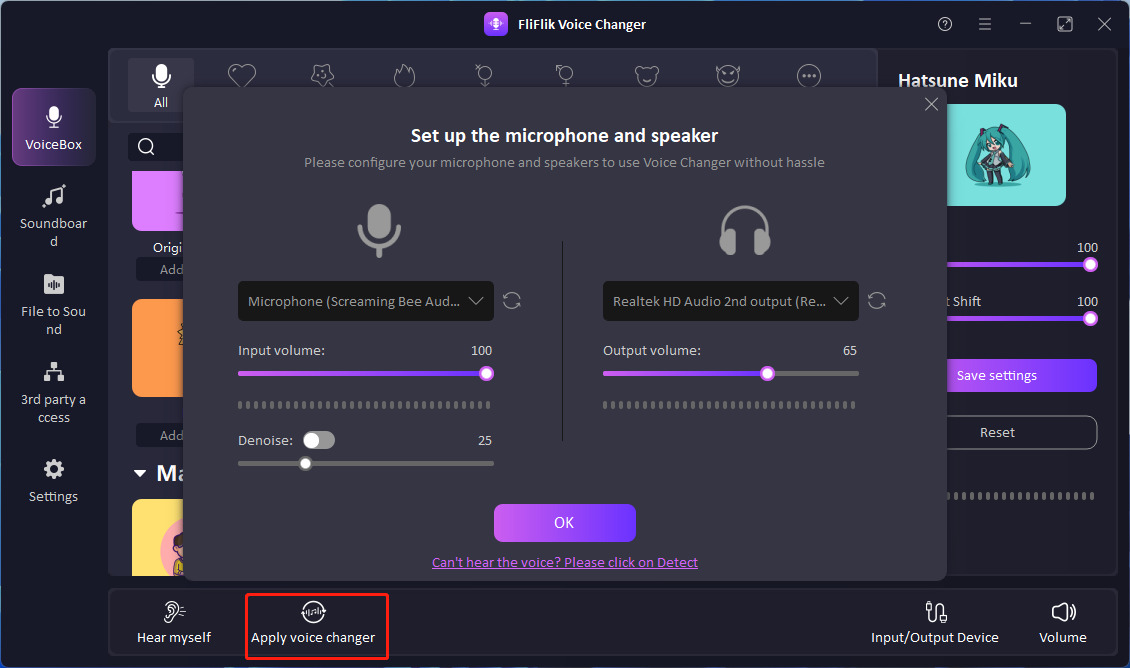
Please check to make sure the “Apply voice changer” button is turned on.
Q2
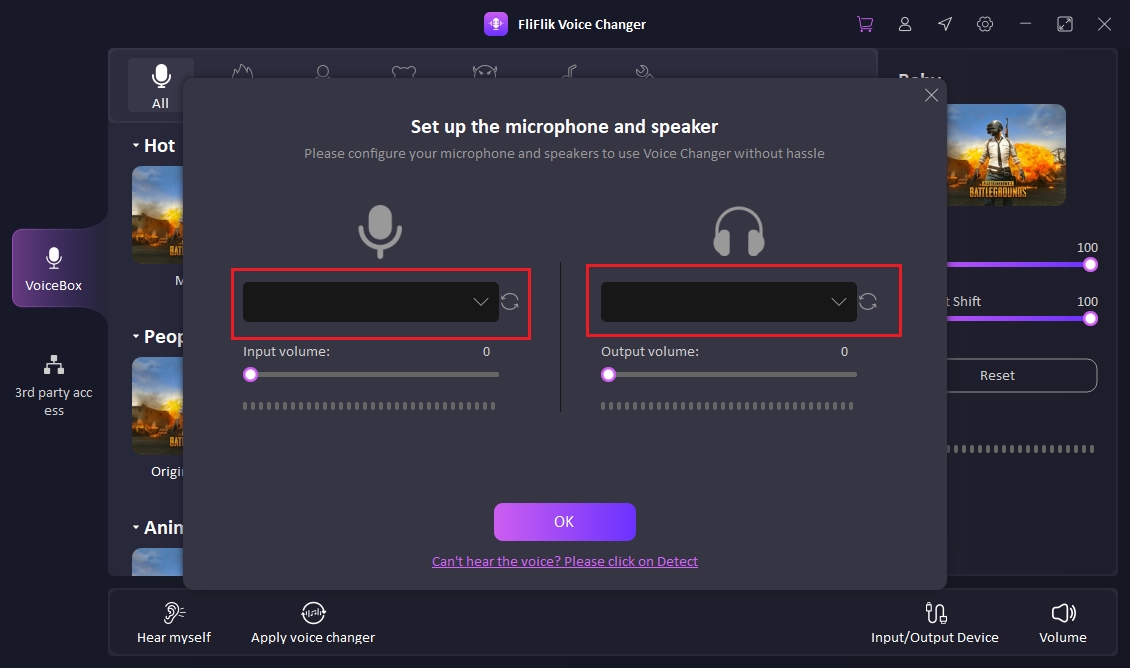
Voice Changer cannot find your audio devices?
Having trouble finding your audio devices on Voice Changer? Don’t worry, there are a few common reasons why this might be happening:
- Your microphone access may be disabled.
- Your audio device could be disabled.
- Your audio driver might not be installed correctly.
- It’s possible that your audio device is broken.
If you’re experiencing any of these issues, here are a few solutions to help you get your audio devices up and running on Voice Changer.
Solution 1. Allow microphone access to Voice Changer
Mac Users: To use Voice Changer with your microphone on macOS, you’ll need to give it permission to access your microphone following the steps below:
MacOS
-
1
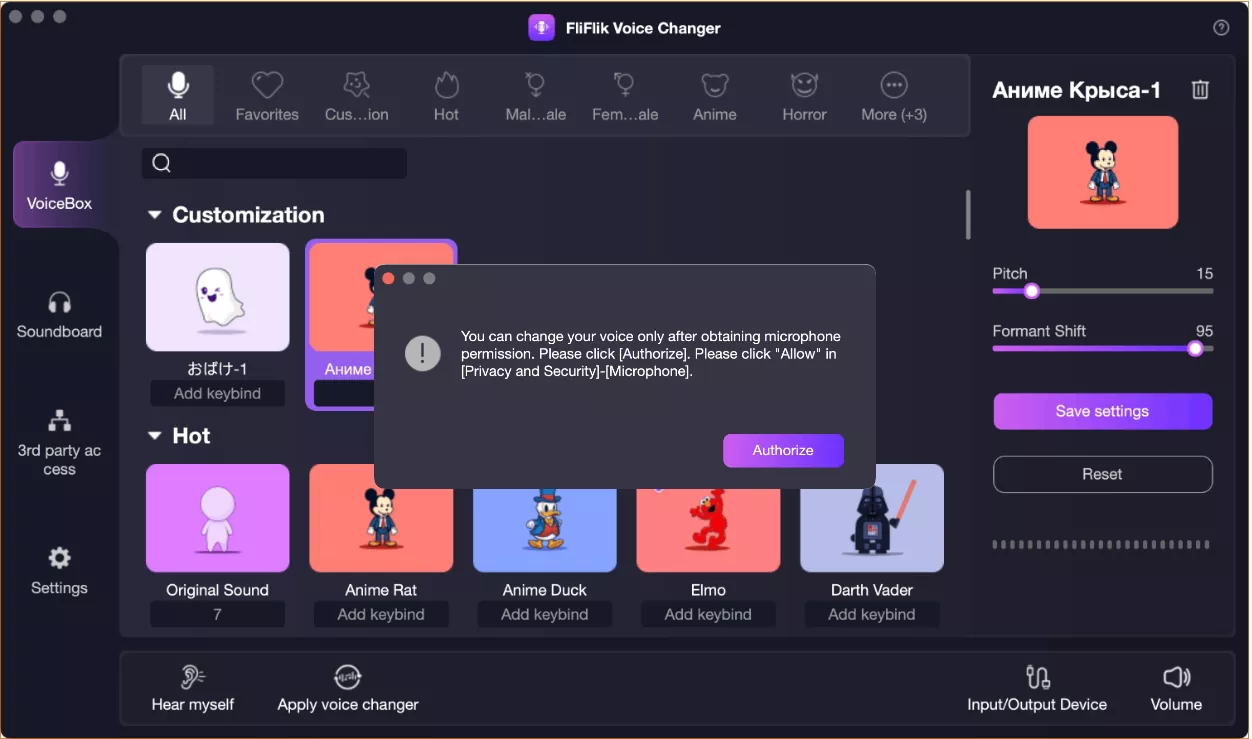
Click the “Authorize” button on the microphone authorization pop-up window when starting.
-
2
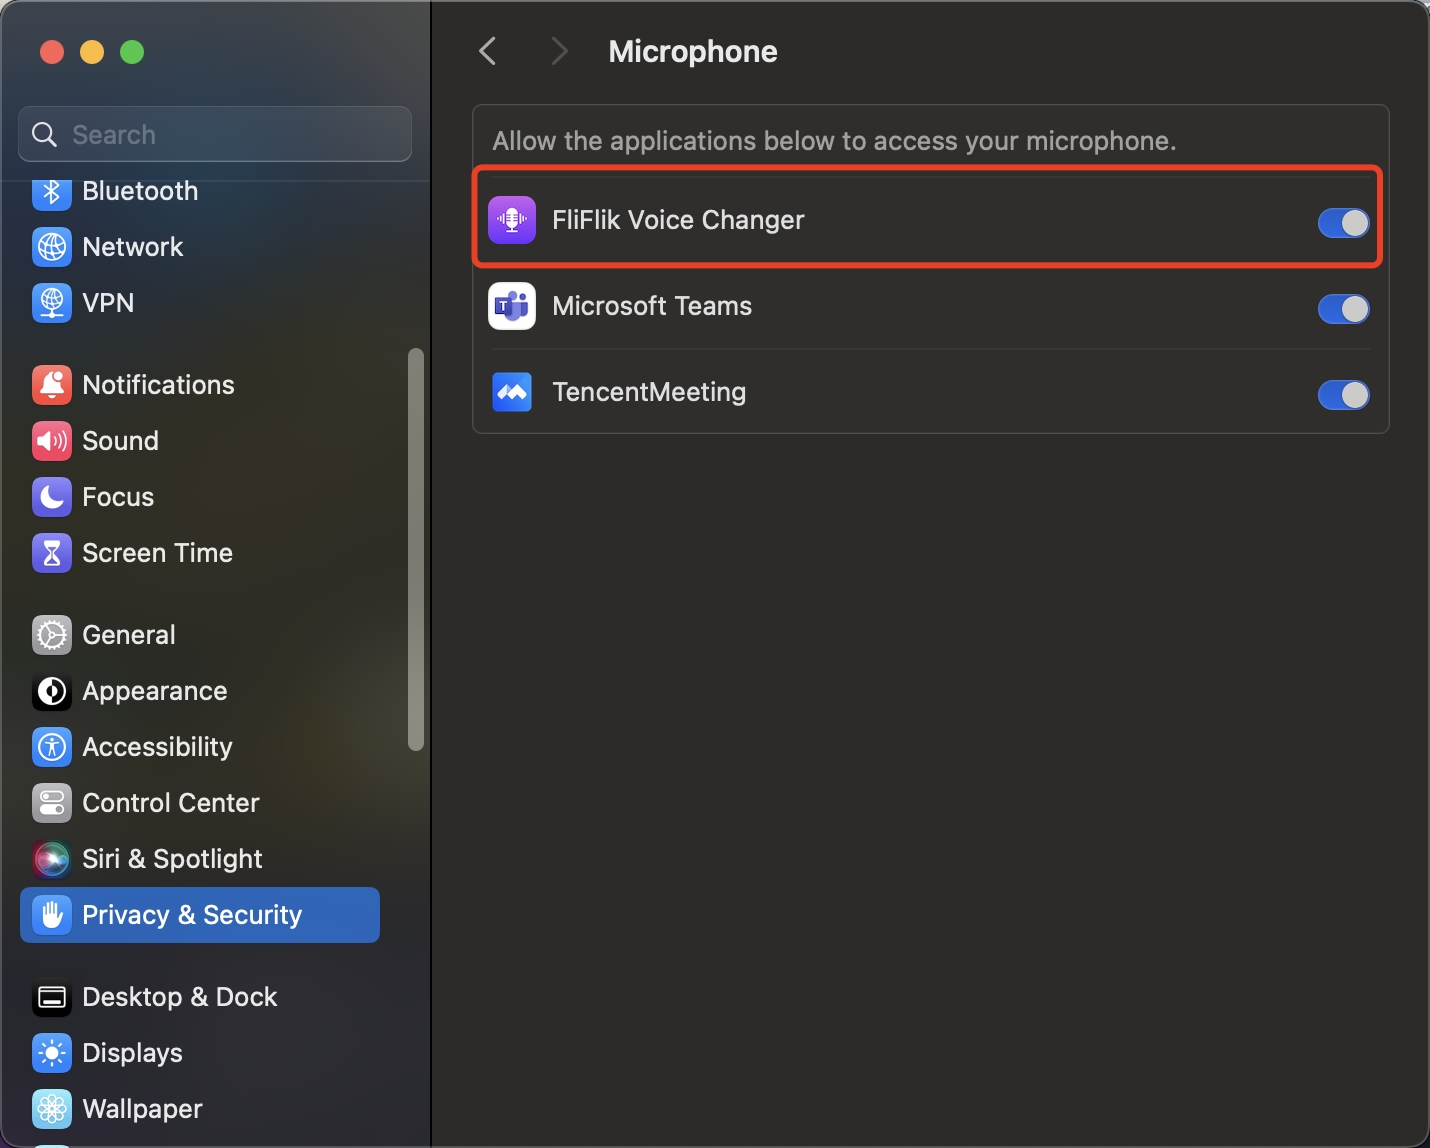
In Privacy & Security > Microphone, allow Voice Changer to access the microphone.
Windows Users: To use Voice Changer with your microphone on Windows 10 or 11, you’ll need to give it permission to access your microphone. Here’s how you can do that:
-
1
Press “Windows + I” to open the “Settings” menu.
-
2
Choose “Privacy & Security” from the left sidebar.
-
3
Click on “Microphone” under App Permissions.
-
4
Enable the options for Microphone access and allowing apps to access your microphone.
-
5
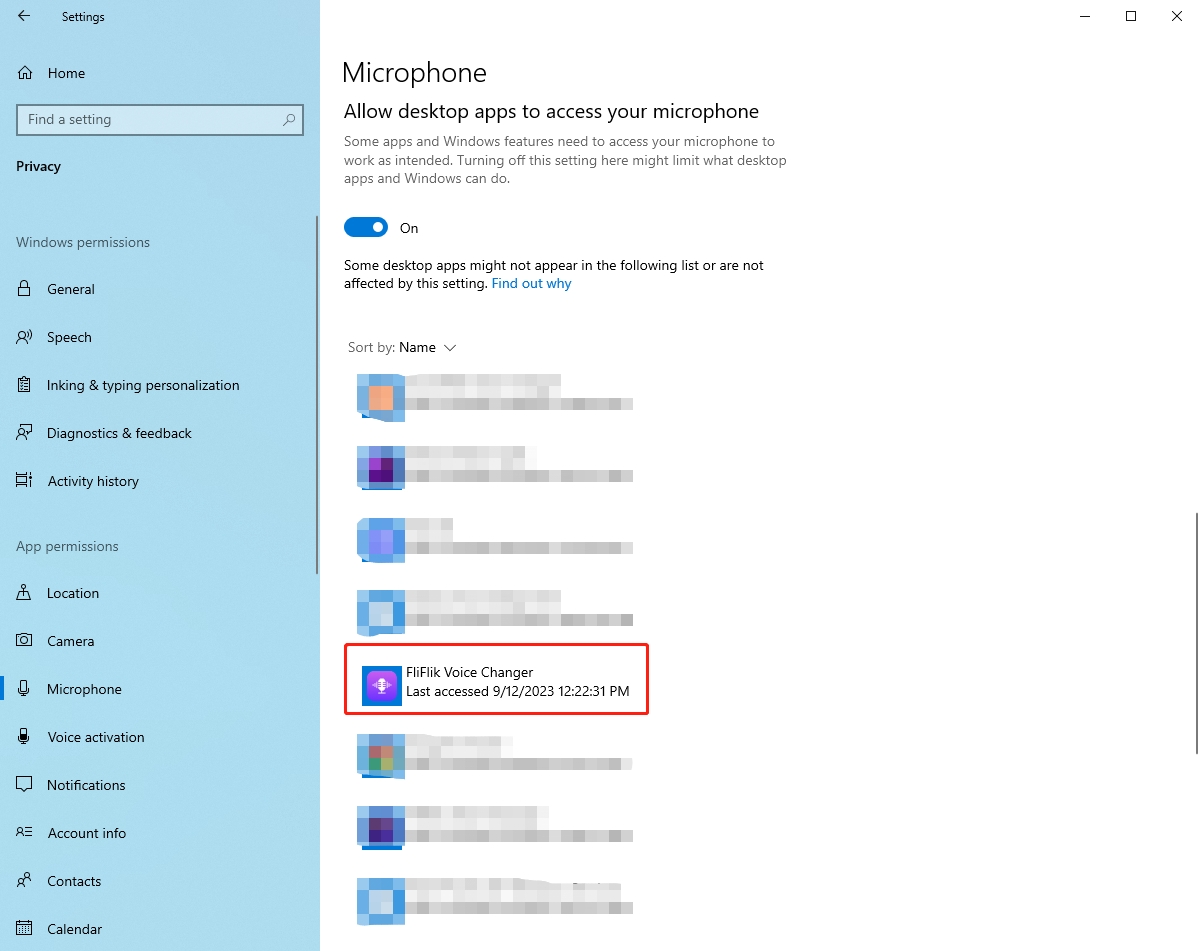
Look for Voice Changer under the “Allow apps to access your microphone” section and make sure it has access to your microphone.
Windows 10
-
1
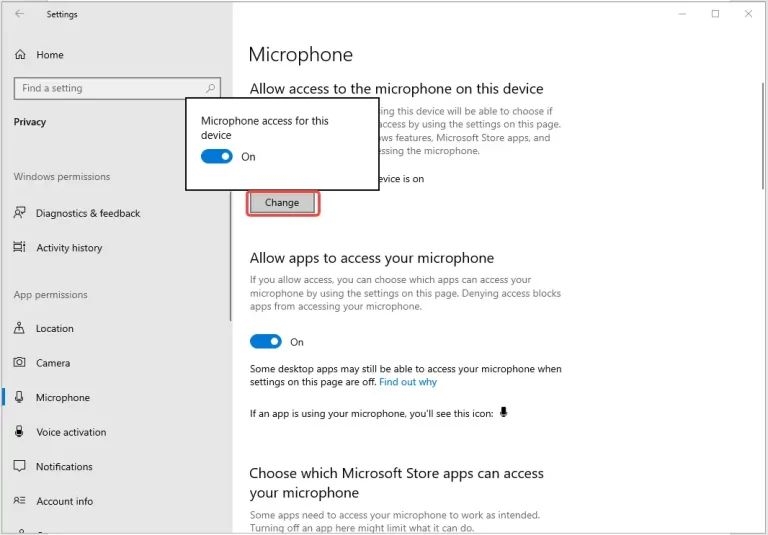
Go to Start Settings Privacy > Microphone. In Allow access to the microphone on this device, click Change and make sure Microphone access for this device is turned on. Turn on microphone access for this device.
-
2
Scroll down until you see Allow apps to access your microphone.
Solution 2. Check if the audio driver is installed correctly
Mac Users: If you haven’t solved the problem after following the previous steps, your Line or Voice Changer microphone may be muted. In this case we recommend that you:
MacOS
-
1
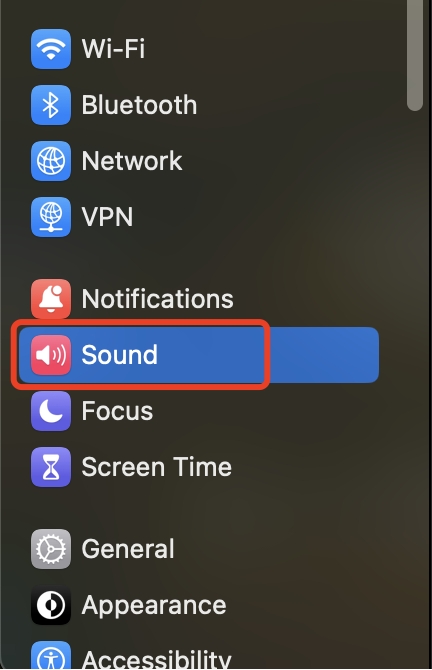
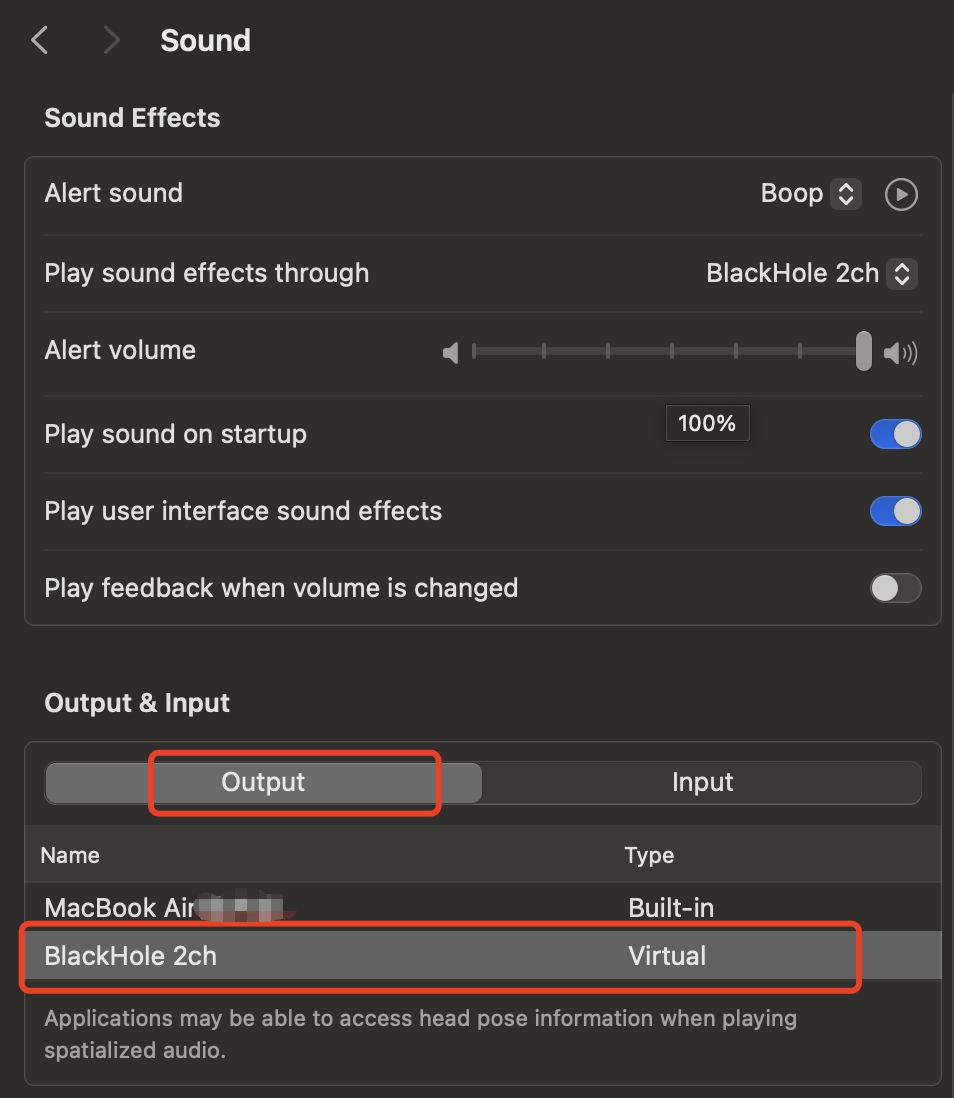
Open the system sound settings on your Mac, click “Sound” and check if the MagicMic is muted.
-
2
On the output options, select “BlackHole 2ch”
Windows Users: If Voice Changer still cannot find your audio device, you can update or reinstall the audio driver.
Method 1. Update audio driver
-
1
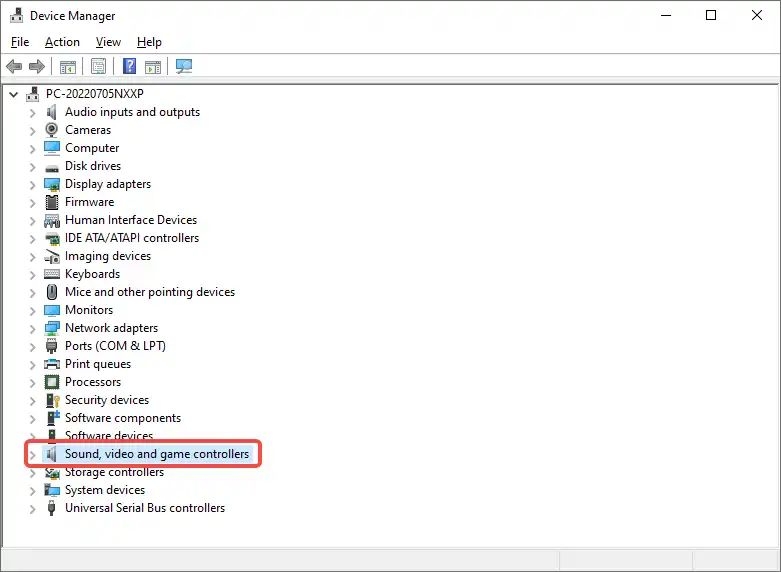
Press “Windows + X” and select Device Manager.
-
2
Scroll down until you find Sound, Video & Game Controllers and expand it.
-
3
Right-click on the desired audio driver and select Update Driver.
-
4
Select Search automatically for updated driver software then select Update Driver.
Method 2. Reinstall the audio driver
-
1
Open Device Manager.
-
2
Expand Sound, Video, and Game Controllers.
-
3
Right-click on Audio Driver and select Uninstall Device.
-
4
Close Device Manager and open it again.
-
5
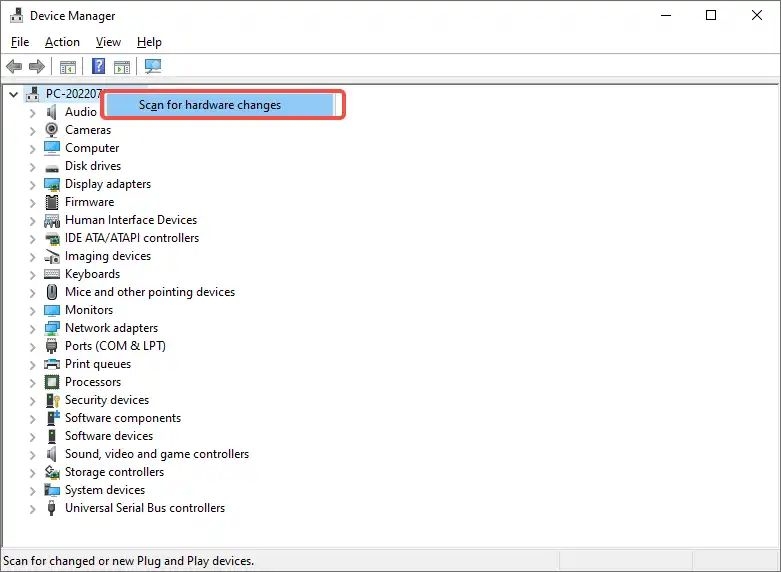
To automatically install the audio driver, right-click on the “Desktop” option and select “Scan for Hardware Changes”.
Solution 3. Enable audio devices on Windows 11/10
On Windows 11:
-
1
Click the “Start” menu in the taskbar and go to “Settings” > “System”.
-
2
In the “System” tab, click “Sound”.
-
3
Scroll down to the “More Sounds” setting and click on it.
-
4
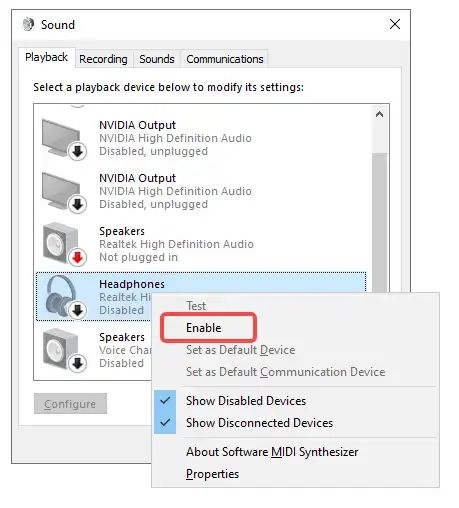
Now, access the Playback tab and verify if your headphones or speakers are disabled. If so, right-click on the disabled device and choose the option to Enable. Next, switch to the recording tab and confirm if your microphone is disabled. Right-click on your microphone and select Enable.
-
5
some tools can make a big difference and not just to devops engineers,
On Windows 10:
-
1
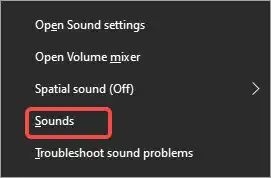
Right-click on the Speaker icon and select Sounds to open the Sound Control Panel.
-
2
Navigate to the “Playback” tab and check if your headphones or speakers are disabled. Right-click the disabled device and select Enable.
-
3
Then switch to the “Recording” tab and check if your microphone is disabled. Right-click on your microphone and select Enable.
-
4
Go back to Voice Changer and check if your audio device appears.
