Tidal has established itself as a major player in the music streaming industry, particularly for its high-quality music and artist support. But whether you want to save money on subscriptions, move to a different service, or just complete a trial period, it’s important to know how to cancel Tidal subscription without losing data.
It’s not always as straightforward as pressing one button, particularly if you subscribed through an intermediary service such as Apple and Google Play. And the most painful part of canceling any music streaming subscription is losing all of the curated playlists and good quality music you have accumulated in the past few months.
In this guide, we’ll cover all the ways you can cancel Tidal, as well as a “secret” way to keep all of your music after your subscription expires.

Part 1. Before You Cancel: What You Should Know
Before you click the “Confirm” button, it is important to consider the short and long-term implications of canceling. Users often assume that they will still be able to access their music in some way, but streaming is a “rental” business.
The cancellation steps in this guide were tested in April 2026 on an iPhone (iOS 26.0) and a Chrome desktop browser, covering the latest process for Tidal. As Tidal recently updated its subscription interface, many older tutorials are now outdated. This guide also explains what happens to your playlists and downloads after cancellation.
What Happens If You Cancel Your Tidal Subscription?
If you cancel your Tidal Music subscription, a few things will happen:
- No offline mode: If you have downloaded music from the Tidal app to play offline, the tracks will be locked. These media files are encrypted and use Digital Rights Management (DRM) to “handshake” with the server.
- Loss of audio quality: If you were subscribed to Tidal’s “Max” or “HiFi” plans, you will no longer be able to access lossless and MQA audio.
- Access until the end of the period: Typically, your account will stay “Premium” until the end of the month. Once the period ends, you will be downgraded to a Free tier (if you’re in a region where Free is offered) or inactive.
- Playlist vulnerability: Although Tidal typically stores your data in the cloud for a while, you can’t listen to the playlists without ads or skips, and often you can’t listen to them at all if Tidal does not have a functional Free service at the time.
Knowing this helps you plan. If you are looking for the best way to cancel my Tidal subscription without losing your music library, check out Part 3.
Part 2. How to Cancel Tidal Music Subscription on Desktop, Android, or iOS
Depending on how you first signed up – via the website, an app store, or a mobile carrier – the steps to unsubscribe from Tidal will vary.
Method 1: Cancel Tidal Subscription via Web Browser (All Devices)
This is the most direct method for users who signed up directly through Tidal’s website.
▼ Steps to Cancel Tidal Subscription via Web Browser:
-
Step 1: Open your preferred web browser and go to my.tidal.com.
-
Step 2: Log in using your account credentials.
-
Step 3: Click on the “Subscription” section.
-
Step 4: Select “Cancel Subscription” and follow the on-screen prompts to confirm.
-
Step 5: Ensure you receive a confirmation email to verify the cancellation.
![cancel-tidal-subscription-via-web-browser]()

Method 2: How to Cancel Tidal Subscription on iPhone / iPad (App Store)
If you subscribed to Tidal using the iOS service, you’ll be billed by Apple. You can’t cancel this via the Tidal website.
▼ Steps to Cancel Tidal Subscription on IOS:
-
Step 1: Open the Settings on your iPhone or iPad.
-
Step 2: Tap your Apple ID (your name at the top).
-
Step 3: Select Subscriptions.
-
Step 4: Look for Tidal in the list of subscriptions.
-
Step 5: Click the Cancel Subscription button. If you are on a free trial, it may say “Cancel Free Trial.”
![cancel-tidal-subscription-on-ios]()

Method 3: Cancel Tidal Subscription on Android (Google Play)
If you subscribed through Google Play, you will cancel from your Google account.
▼ Steps to Cancel Tidal Subscription on Android:
-
Step 1: Launch the Google Play Store app.
-
Step 2: Tap your Profile Icon at the top right corner.
-
Step 3: Select Payments & Subscriptions > Subscriptions.
-
Step 4: Choose Tidal, then select Cancel Subscription and provide a reason if prompted.
![cancel-tidal-subscription-on-android]()

Method 4: Cancel Tidal Subscription from Associated Services
For others, Tidal is part of a package. For instance, Tidal may be bundled with Sprint (now T-Mobile), Best Buy or Amazon.
▼ Steps to Cancel Tidal Subscription from Associated Services:
-
Step 1: Sprint/T-Mobile: You need to access your mobile carrier’s account site (e.g., My T-Mobile) and update your “Add-ons”.
-
Step 2: Best Buy: Log in to your Best Buy account and navigate to “Manage Subscriptions” to cancel the Tidal renewal.
-
Step 3: Third-Party Bundles: For those who pay for Tidal through a digital wallet or tech bundle, you need to go to the billing source to cancel the subscription.
Part 3. Bonus: Keep Tidal Music Forever Without Subscription
Learning how to cancel Tidal subscription is not a problem, but the biggest problem is about to lose your entire music library when your subscription runs out. That’s where UltConv Tidal Music Downloader comes into play.
UltConv Tidal Music Downloader is a powerful, user-friendly media downloader that supports over 1,000 websites. It lets you easily download Tidal songs, albums, and playlists in just a few clicks, with no technical hassle. For music lovers, it offers high-quality formats like FLAC to preserve full audio detail, and its built-in browser ensures a smooth experience on both Windows and Mac.
- Convert Tidal music to MP3, FLAC, AAC, and 100+ output formats with ease.
- Compatible with 10,000+ sites, including Tidal, Spotify, and YouTube.
- Batch convert entire playlists, albums, or libraries in one click.
- Permanently download music while preserving ID3 tags and metadata for an organized library.
- Delivers high-quality audio, up to lossless FLAC and 320kbps.
- Integrated browser for seamless searching and downloading.
▼ How to Download Music from Tidal with UltConv Tidal Downloader:
Go to the UltConv website to download and install the program on your Windows or Mac PC. It will only take a few minutes to set up.
FREE DOWNLOAD![secure download]() Secure Download
FREE DOWNLOAD
Secure Download
FREE DOWNLOAD![secure download]() Secure Download
Secure Download
After installing and launching the app, head to the Download section, then click the bottom-left Download button. Select MP3 or FLAC in the pop-up output format window.

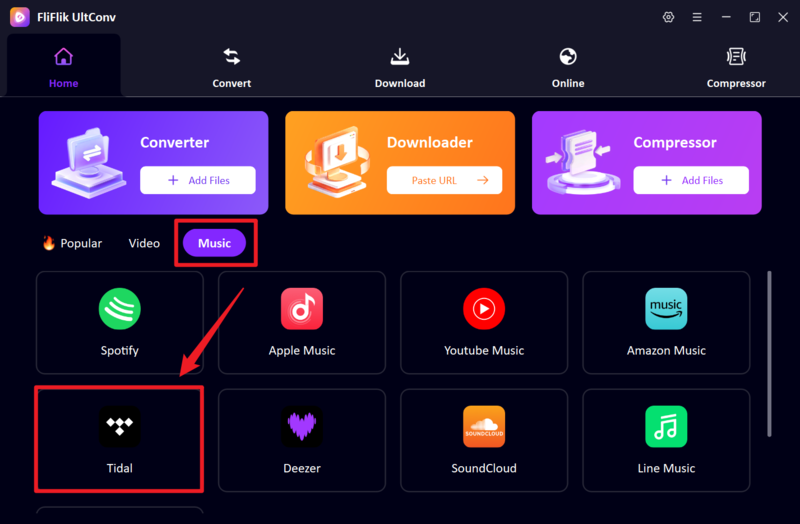
Launch the program. Click on the Music tab, and select Tidal Converter from the list of platforms.
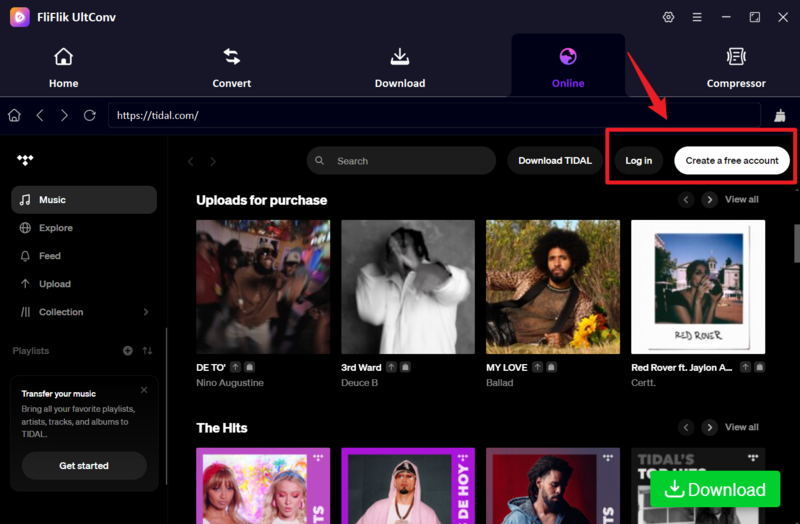
Log into your Tidal account through the secure login within the app. This will give the software access to your library.
-
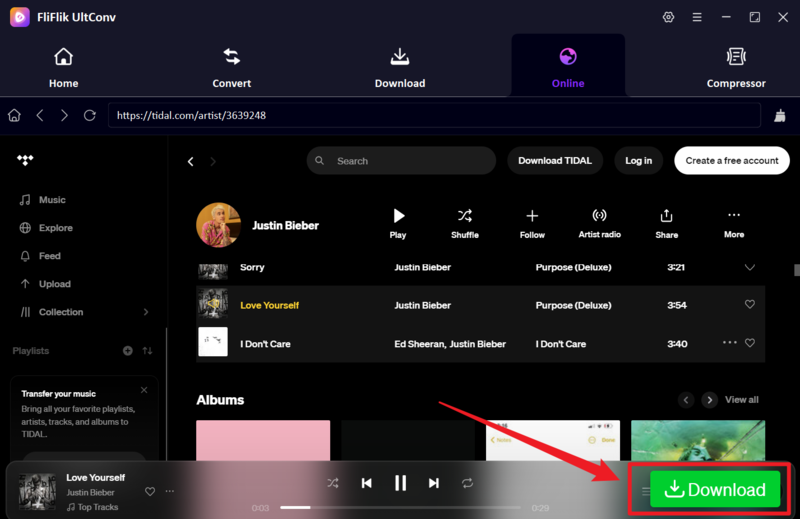
Locate the songs, album or playlist you wish to save. Click on the Download button.
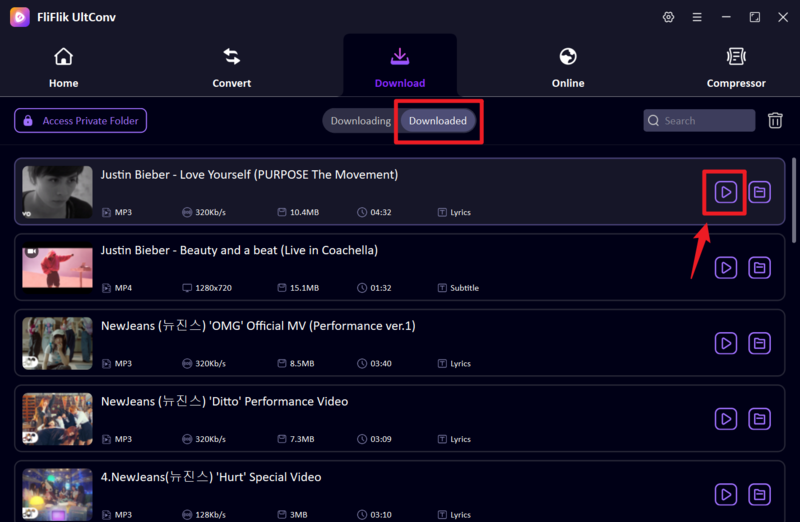
It will begin to download. Once complete, your files can be found in the Downloaded tab. You now have the Tidal music stored on your hard drive, available to play offline, anytime, on any device.


Part 4: FAQs
Q1. Will I get a refund if I cancel my Tidal subscription?
Tidal does not usually provide a pro-rated refund for the unused days of a subscription. Once you’ve paid for the month, you can use it until the end of the month. If you think you have been charged incorrectly, you will need to contact Tidal Support or Apple/Google, if you have subscribed via their stores.
Q2. When will my Tidal subscription cancel?
It will be effective from the end of the current billing cycle. For instance, if you cancel on the 5th of the month and your subscription normally renews on the 15th, you will be able to listen to “Premium” for another 10 days.
Q3. Is it possible to download and listen to Tidal offline with a free trial?
Yes, Tidal offers offline downloads with a free trial. But the files will be encrypted. After the trial period, and when you cancel your Tidal subscription, these files will no longer be playable. If you want to retain them, you can do so with a program like UltConv before your trial ends.
Q4. Can I get any Tidal benefits if I terminate my subscription?
If you want to save costs but retain your music, use UltConv Tidal Downloader. This tool will let you make a “backup” of your entire collection to MP3 or FLAC. After this, you can play the files on your computer with any other media player without paying for a subscription again.
Part 5: Wrapping Up
Learning how to cancel Tidal subscription is a straightforward process whether you are on a desktop, iPhone, or Android. However, the standard cancellation process leaves you with an empty music library.
By following the steps in this guide, you can successfully how to unsubscribe from Tidal and avoid further charges. If you want to ensure that your carefully curated playlists don’t disappear, we highly recommend using UltConv Tidal Downloader. It is the most reliable way to transition from a “renter” to an “owner” of your music, ensuring your favorite high-fidelity tracks stay with you long after your subscription has ended.
Ready to take control of your music? Give UltConv a try today and build a permanent music library that belongs to you.